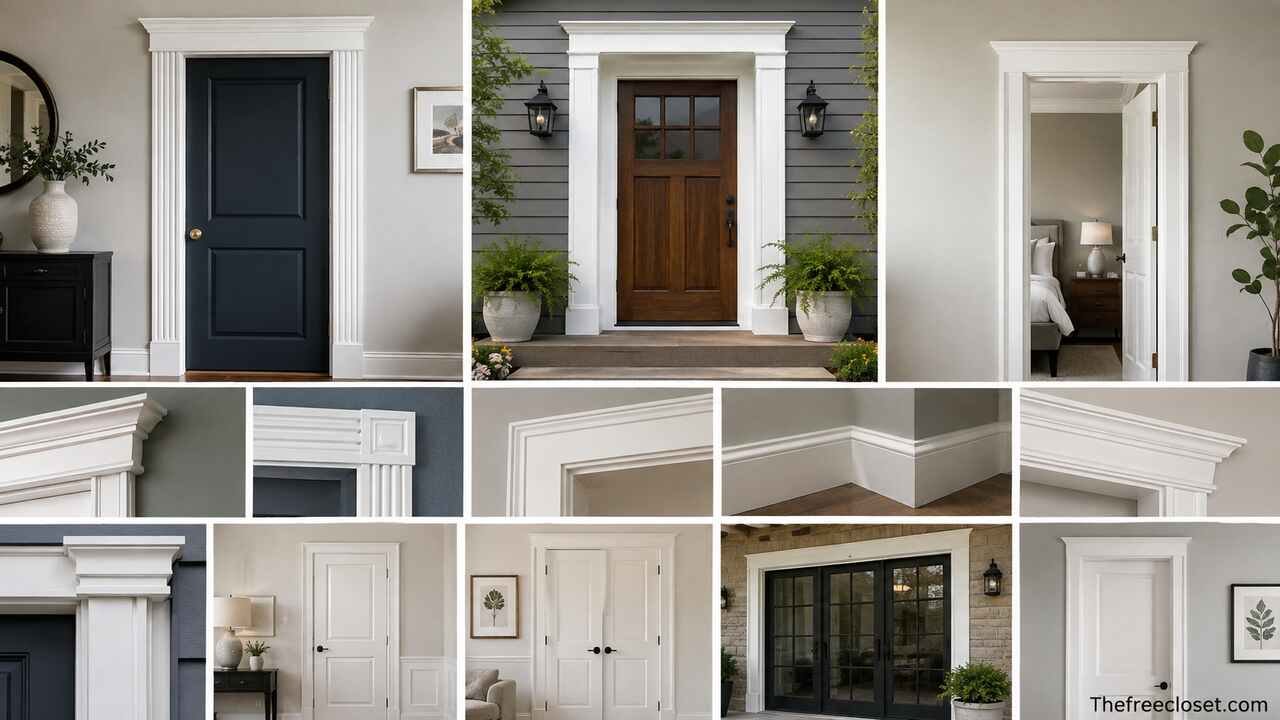
Door Trim Ideas: Stylish Interior and Exterior Molding Designs for Every Home
Door trim can transform a doorway and improve a room’s overall appearance. It highlights options such as modern flat casing, craftsman trim, decorative molding, natural wood, and painted designs, while emphasizing the importance of matching trim style, proportions, materials, and colors with the home’s architecture.
Match the Door Trim to Your Home’s Architectural Style
Start by choosing door trim that belongs with the architecture already present in the room. A modern interior generally benefits from restrained profiles and straight lines, while traditional rooms can support deeper molding, layered casing, decorative headers, and more pronounced details.
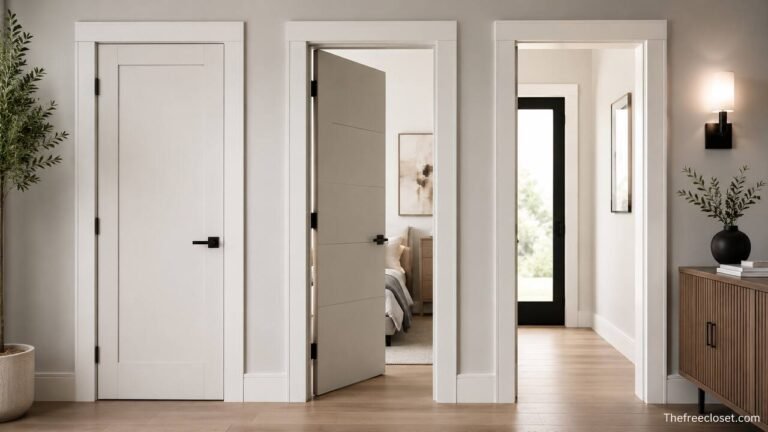
Modern door trim often uses flat stock with minimal ornamentation. Boards with square edges create clean transitions around the opening and work particularly well with contemporary doors, neutral walls, and simple baseboards. Keeping the casing relatively narrow can further emphasize the streamlined appearance.
Craftsman interiors typically use wider flat boards with a substantial top piece. The vertical side casings remain uncomplicated while the header becomes the visual emphasis. This arrangement gives the doorway architectural weight without relying on elaborate molding profiles.
Traditional and transitional interiors offer greater flexibility. Colonial-inspired casing, stepped profiles, back bands, rosettes, fluting, and crown-like headers can all work when they relate to existing baseboards, window trim, cabinetry, or ceiling molding.
Farmhouse interiors usually favor uncomplicated woodwork. Wide painted boards are common, although natural or lightly stained wood can introduce warmth. A simple projecting header can provide enough detail without making the doorway overly formal.
| Home Style | Suitable Door Trim | Typical Finish | Overall Effect |
| Modern | Flat square-edge casing | White, black, or wall color | Clean and streamlined |
| Craftsman | Wide flat casing with header | Painted or stained wood | Solid and architectural |
| Farmhouse | Simple wide boards | White or natural wood | Casual and warm |
| Traditional | Profiled or layered molding | White, cream, or stain | Detailed and formal |
| Transitional | Simple casing with subtle profile | Neutral paint or stain | Balanced and versatile |
| Rustic | Natural timber casing | Stain, oil, or clear finish | Textured and organic |
Matching the style does not mean every piece of molding must be identical. Instead, door casing, window casing, baseboards, and crown molding should share enough visual characteristics that the room feels coordinated.
Choose Door Trim Widths That Fit the Room
Select casing dimensions according to the size of the doorway, ceiling height, baseboard dimensions, and available wall space. Proper proportions often have a greater effect on the finished result than decorative complexity.
Standard-width casing provides an unobtrusive border and works especially well in smaller rooms. Wider casing creates stronger visual emphasis and can make a basic builder-grade doorway appear more custom. Large rooms and tall ceilings can generally accommodate more substantial trim without feeling crowded.
Baseboards provide a useful reference point. Very narrow door casing beside unusually tall, heavy baseboards can appear undersized. Conversely, oversized casing paired with tiny baseboards may look disconnected. The two elements do not have to match in width, but they should have comparable visual weight.
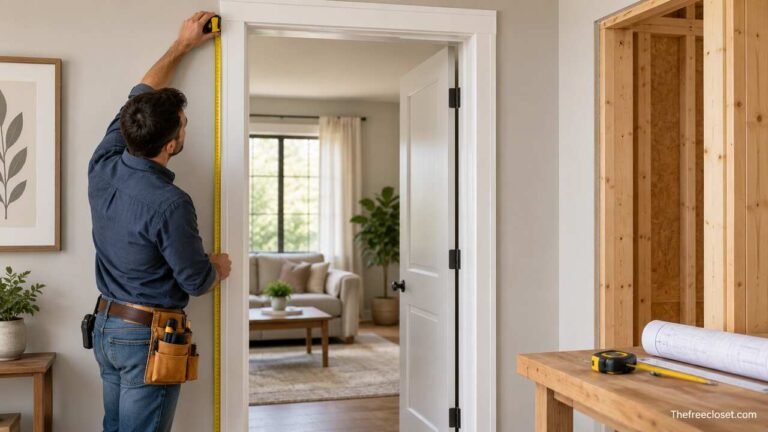
Wall space also matters. A wide trim design may look excellent around a single doorway but become difficult where two doors sit close together. Before buying material, measure the distance between nearby openings, corners, switches, outlets, cabinets, and other fixed features.
For tall doors, consider increasing the scale of the casing or emphasizing the header. The added height creates enough visual space to support larger architectural details.
Install Simple Flat Door Casing for a Modern Look
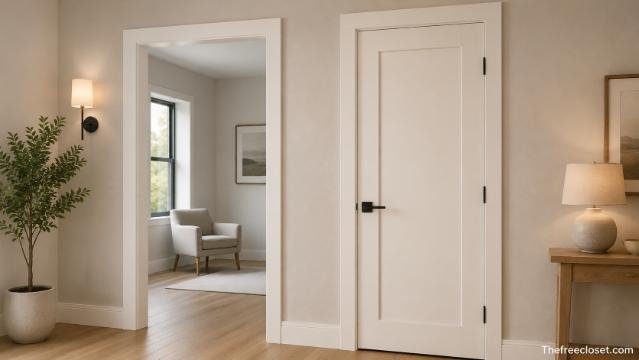
Use flat boards around the doorway when you want an uncomplicated design with crisp geometry. Flat casing is one of the most adaptable door trim ideas because its appearance changes significantly according to width, thickness, finish, and installation method.
A basic arrangement uses two vertical boards and one horizontal top board. Square butt joints can produce a contemporary or craftsman-inspired appearance, while mitered corners create a more conventional frame.
Painted MDF is commonly suited to smooth interior applications because it provides consistent edges and accepts paint well. Primed finger-jointed wood is another practical painted option. Solid wood becomes particularly attractive when the grain will remain visible under stain or a clear finish.
Flat trim can also be painted the same color as the wall. This approach preserves architectural depth while reducing visual contrast. Dark trim against lighter walls creates the opposite effect, making the doorway a graphic feature.
Thickness deserves attention as well. Slightly thicker boards create deeper shadow lines and can make even a plain casing design feel more substantial.
Build Craftsman Door Trim with a Strong Header
Create craftsman-style door trim by combining straightforward vertical casing with a wider or more detailed horizontal header. The design relies primarily on proportion and layered construction rather than curved or ornate molding.
Install vertical side boards first, then construct the top section using a wider header board. Depending on the desired level of detail, the header can include a projecting cap, small horizontal fillets, or stacked boards that create additional depth.
The header typically extends beyond the outer edges of the vertical casing. This projection gives the top of the doorway greater visual weight and produces the characteristic craftsman silhouette.
Painted craftsman trim works well in white, warm off-white, gray, and other architectural neutrals. Stained oak, pine, maple, or other woods can create a warmer interpretation, particularly when nearby doors, floors, or built-ins use natural wood.
Keep surrounding trim consistent. If a craftsman door has a substantial header, using related details around windows can establish a cohesive architectural language throughout the space.
Add a Decorative Door Header for More Character
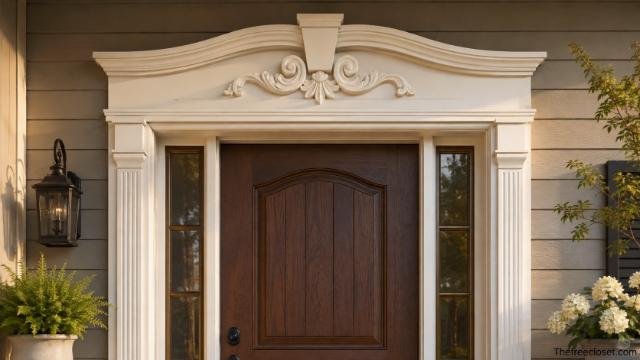
Upgrade otherwise simple casing by concentrating decorative detail above the door. A header treatment draws the eye upward and can make an ordinary opening feel taller and more important.
One approach combines plain side casing with a wider top board and projecting cap. Another uses small molding profiles above and below the header to create layered shadow lines. Traditional interiors may support a pediment-inspired top, while transitional spaces generally benefit from restrained detailing.
Decorative headers work especially well on prominent openings such as dining room doors, living room entrances, home offices, primary bedroom doors, and passageways visible from a foyer.
Not every doorway needs the same level of decoration. A home can use simpler trim around secondary rooms while reserving more elaborate headers for important openings. Maintaining common board dimensions, colors, or profiles will still connect the designs.
Be mindful of ceiling clearance. A large header placed too close to the ceiling can look compressed. Taller walls provide more room for stacked trim and pronounced caps.
Layer Door Casing for a High-End Appearance
Create more depth by combining standard casing with additional molding instead of relying on a single profile. Layered door trim produces shadows and visual dimension that can make an opening appear more substantial.
A back band is one of the easiest additions. This narrow molding wraps around the outer edge of existing casing, effectively making the trim wider and deeper. It can transform relatively simple casing without requiring an entirely different architectural design.
Traditional installations can combine profiled casing, back bands, and decorative top molding. Transitional installations can achieve a similar sense of depth using flat boards of different thicknesses.
The individual layers should remain proportional. Adding too many small profiles can create visual clutter, especially in rooms with standard ceiling heights or limited wall space.
Layering is particularly effective when doors need to compete visually with substantial baseboards, crown molding, paneled walls, or built-in cabinetry.
Use Natural Wood Door Trim to Add Warmth
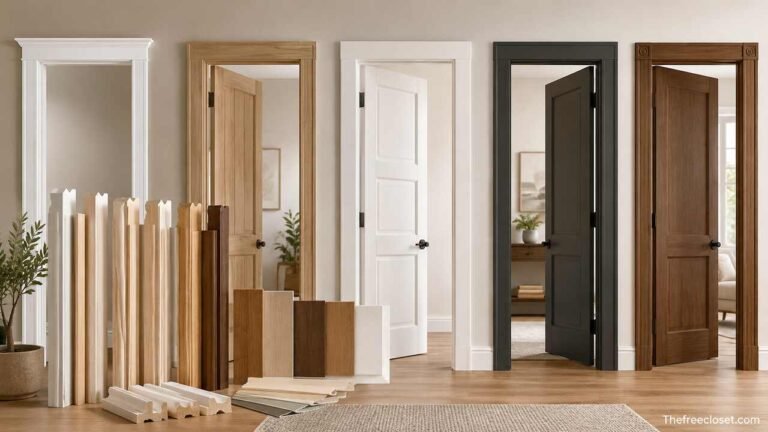
Choose stained or clear-finished wood when you want the door casing to contribute visible grain, warmth, and natural variation. Wood trim works in traditional, craftsman, rustic, mid-century, and contemporary interiors depending on the species and profile.
Oak offers pronounced grain and a substantial appearance. Maple tends to look smoother and more restrained. Pine can suit casual, farmhouse, and rustic spaces, while walnut creates rich contrast in sophisticated modern interiors.
The stain color should relate to nearby wood surfaces without necessarily matching them perfectly. Flooring, furniture, cabinetry, ceiling beams, and the door itself can provide useful reference points.
A clear or lightly tinted finish preserves more of the natural variation. Dark stains create stronger visual boundaries around the doorway and can make lighter wall colors appear brighter by comparison.
Natural wood requires careful preparation because joints, filler, grain direction, and surface imperfections remain more visible than they would under opaque paint. Accurate cuts therefore become especially important.
Paint Door Trim in a Contrasting Color
Turn casing into a design feature by selecting a color that contrasts with the surrounding wall. White trim remains versatile, but black, charcoal, deep green, navy, beige, taupe, and other intentional colors can create distinctive results.
Dark door trim works especially well with light walls because the strong outline defines the opening. Black casing paired with black doors can produce a unified contemporary appearance, while charcoal or dark green provides a softer alternative.
A medium neutral such as greige or taupe can introduce contrast without becoming dominant. This approach fits transitional interiors where pure white trim may feel too sharp.
For stronger continuity, repeat the trim color on baseboards, window casing, built-ins, or doors. Repetition makes an unusual color appear deliberate rather than isolated.
Consider the entire room before selecting the shade. Flooring undertones, wall paint, metal hardware, furniture, and natural light can change how the trim color appears throughout the day.
Blend Door Trim with the Wall Color
Paint the casing and wall in the same or closely related color when you want a quiet, integrated appearance. This technique reduces the visual outline around the door while retaining the dimensional effect created by the molding.
Monochromatic trim is particularly effective in modern, minimalist, and color-drenched interiors. It can also make rooms containing several doors feel less visually busy because every opening does not create a contrasting frame.
The paint sheen can provide subtle separation. For example, walls may use a matte or eggshell finish while trim uses satin or semi-gloss in the same color. Light then reflects differently from the molding, allowing the architecture to remain visible.
This strategy also helps when door casing is attractive in shape but should not become the room’s main feature. Furniture, artwork, cabinetry, or another architectural element can retain visual priority.
Darker monochromatic rooms can produce especially dramatic results because walls, doors, casing, and baseboards form one continuous color field.
Coordinate Door Trim with Baseboards and Window Casing
Connect the door casing to surrounding millwork so the entire room reads as one design. Door trim rarely exists in isolation, and inconsistencies become particularly obvious when casing meets baseboards or sits beside a trimmed window.
Start with profile relationships. Flat door casing generally looks most cohesive with relatively simple baseboards and window trim. Highly decorative casing is better supported by baseboards that contain comparable traditional detailing.
At the bottom of the doorway, determine how the casing will transition into the baseboard. A plinth block can create a deliberate stopping point and eliminate the need to force two different profiles together.
Window casing can usually repeat the door casing or use a simplified version of it. Repeating the same color and material provides another way to maintain continuity when dimensions differ.
| Trim Component | Main Design Consideration | Best Coordination Strategy |
| Door casing | Width and profile | Relate scale to doorway |
| Header | Height and projection | Match architectural style |
| Baseboard | Height and thickness | Balance visual weight |
| Window casing | Profile and color | Repeat or simplify door casing |
| Plinth block | Width and height | Make slightly substantial at transitions |
| Crown molding | Detail level | Avoid competing profiles |
A coordinated trim package makes renovations feel planned. Even inexpensive molding can look convincing when dimensions, profiles, transitions, and finishes work together.
Add Plinth Blocks for Cleaner Baseboard Transitions
Install plinth blocks at the bottom of the vertical casing when you want a clear transition between door trim and baseboard. These rectangular blocks are particularly useful when the two moldings have different thicknesses or profiles.
The plinth should generally feel slightly more substantial than the casing around it. Its purpose is both decorative and practical because it provides a flat termination point for adjacent moldings.
Traditional rooms can use shaped or routed plinth blocks, while craftsman and transitional spaces often look better with simple rectangular blocks. A plain block can introduce architectural detail without adding ornate decoration.
Plinth blocks are also helpful during renovation projects where new casing must connect to existing baseboards. Instead of trying to create a perfect profile-to-profile joint, the block separates the two components.
Keep their use consistent within connected spaces. Installing them randomly on only a few similar doors can make the trim scheme feel unfinished.
Install Fluted Door Trim for Traditional Detail
Use fluted casing to introduce vertical texture around a doorway. Fluting consists of repeated shallow grooves running along the length of the molding, creating light and shadow without requiring extremely elaborate ornamentation.
Fluted side casing is frequently paired with rosettes or decorative corner blocks. This configuration avoids mitered top corners because each vertical and horizontal piece terminates at a block.
Another option pairs fluted sides with a substantial decorative header. This combination creates a more formal doorway and can work well in dining rooms, studies, traditional living rooms, and formal entrances.
Because fluting adds visible detail, keep nearby architectural elements in mind. Combining heavily fluted casing with numerous unrelated molding profiles can overwhelm a small room.
Painted finishes highlight the shape through shadows, while stained finishes emphasize both the carved profile and wood grain.
Frame Doorways with Rosettes and Corner Blocks
Add rosettes or square corner blocks where vertical and horizontal casing meet. These decorative pieces provide an alternative to mitered corners and can make installation more forgiving while adding period character.
Rosettes generally suit Victorian, traditional, and historically influenced interiors. Square corner blocks with minimal detailing can work in simpler settings where a cleaner appearance is preferred.
The blocks should be large enough to terminate the casing comfortably. Undersized blocks can look awkward when paired with wide trim, while excessively large rosettes can dominate a standard doorway.
This treatment is particularly useful when decorative casing profiles would otherwise require precise miter alignment. Straight cuts can meet the corner blocks instead.
For a cohesive appearance, coordinate corner blocks with plinth blocks at the floor. Together they create clearly defined beginning and ending points for the vertical casing.
Create Minimalist Trimless-Look Doorways
Reduce visual ornamentation by using extremely simple casing, narrow reveals, or architectural detailing designed to make the doorway blend into the wall. This approach works particularly well in minimalist and contemporary interiors.
A practical version uses narrow flat casing painted exactly the same color as the wall. The molding remains functional but becomes visually understated.
More specialized construction can create nearly flush wall-to-frame transitions. These designs typically require careful framing and drywall detailing, making them easier to execute during new construction or substantial remodeling than during a simple trim replacement.
Flush or concealed doors can take the concept further by aligning the door surface with the surrounding wall. However, this approach requires compatible jambs, hinges, hardware, and wall construction.
Minimalism depends heavily on precision. When ornamentation disappears, uneven reveals, rough drywall edges, and inconsistent joints become more noticeable.
Upgrade Interior Doors with Two-Tone Trim
Combine two complementary finishes when a single-color casing feels too predictable. Two-tone designs can separate the door from the casing, highlight a header, or connect different finishes used throughout the room.
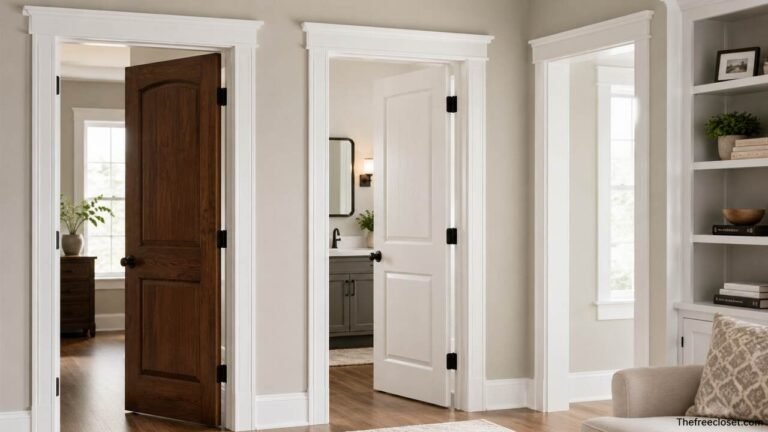
A dark painted door surrounded by light casing creates a strong but familiar contrast. Natural wood doors with painted casing provide warmth while keeping the surrounding millwork visually consistent.
Another approach keeps the side casing neutral while emphasizing a decorative header with a related shade. This technique should be used selectively because too many competing colors can fragment the doorway.
Hardware helps connect the palette. Black hinges and handles can reinforce dark trim, while brass or bronze hardware can complement warm wood and earthy paint colors.
Two-tone combinations work best when both colors already have a relationship to other materials in the room.
Enhance Exterior Doors with Weather-Resistant Trim
Choose exterior door trim according to exposure, climate, siding material, and maintenance requirements. Exterior casing has to provide visual definition while tolerating moisture, sunlight, and temperature changes.
Wood can create a traditional appearance but requires appropriate species selection, sealing, priming, painting, and ongoing maintenance. Engineered exterior trim materials and cellular PVC can offer improved resistance to moisture and decay in exposed locations.
The design should relate to the home’s facade. Traditional homes may benefit from wider casing and decorative headers, while contemporary exteriors often use simple flat trim with strong color contrast.
Proper flashing and water management are more important than decorative details. Exterior trim should never be treated as the primary waterproofing system around an opening. Installation must account for the door manufacturer’s requirements and the wall’s drainage strategy.
Color can connect the entrance to shutters, siding, porch columns, fascia, or other exterior features. Contrasting casing can emphasize the entrance, while trim close to the siding color creates a quieter facade.
Finish Door Trim with Clean Joints and Consistent Reveals
Improve the final appearance by focusing on installation details. Even an expensive molding profile can look poor when joints open, reveals vary, or paint preparation is incomplete.
Mark a consistent reveal around the jamb before positioning the casing. This narrow visible portion of the jamb creates a clean line around the doorway and helps prevent irregular alignment.
Use the appropriate joint for the selected design. Miter joints suit many profiled casings, while butt joints complement craftsman and modern flat-stock installations. Headers and layered assemblies may require additional blocking or fastening depending on their construction.
Fill nail holes, address visible gaps appropriately, sand painted trim smooth, and prepare surfaces before applying the finish coat. Stained wood demands even greater care because filler and poorly fitted joints are harder to conceal.
Before permanently installing decorative trim, dry-fit the pieces around the opening. This simple step makes it easier to identify proportion problems, uneven walls, or awkward transitions.
Conclusion
The strongest door trim ideas combine architectural style, appropriate proportions, coordinated materials, and careful installation. Simple flat casing can give a modern room a crisp finish, while craftsman headers, layered molding, plinth blocks, fluting, and decorative profiles can introduce greater architectural character.
Color provides another powerful design tool. White casing offers timeless contrast, dark trim turns the doorway into a feature, natural wood introduces warmth, and wall-matched casing creates a quieter contemporary result. Regardless of style, coordinate the door trim with baseboards, windows, doors, flooring, and nearby millwork. When these components share a consistent visual language, even relatively simple door casing can make an entire room feel more finished and thoughtfully designed.
Discover the latest fashion trends, home ideas, travel tips, and lifestyle inspiration at thefreecloset.com.
FAQ’s
Simple flat or lightly profiled casing is among the most versatile choices because it works with modern, transitional, farmhouse, and craftsman interiors. Wider flat boards can create a more substantial custom appearance without excessive ornamentation.
Door trim does not have to be identical to the baseboards, but the two should coordinate in color, thickness, scale, and overall style. A plinth block can create a clean transition when the profiles differ significantly.
Not necessarily. Matching the door and trim creates a unified appearance, while contrasting colors emphasize the shape of the doorway. Both approaches can work when the colors relate to the rest of the room.
Use wider casing, add a back band, build a substantial header, incorporate plinth blocks, or create layered molding. Precise joints, smooth preparation, consistent reveals, and a high-quality paint or stain finish also make a major difference.
MDF provides a smooth, consistent surface for painted interior casing and can be cost-effective. Solid wood is preferable when visible grain, staining, durability, or a natural appearance is important. Moisture exposure should also influence material selection.
Yes, particularly when different areas have distinct purposes or architectural treatments. However, connected rooms usually look more cohesive when their casing shares common characteristics such as color, board proportions, profile style, or material.