Door Casing Styles: How to Choose Profiles, Materials, Sizes, and Finishes for Interior Doors
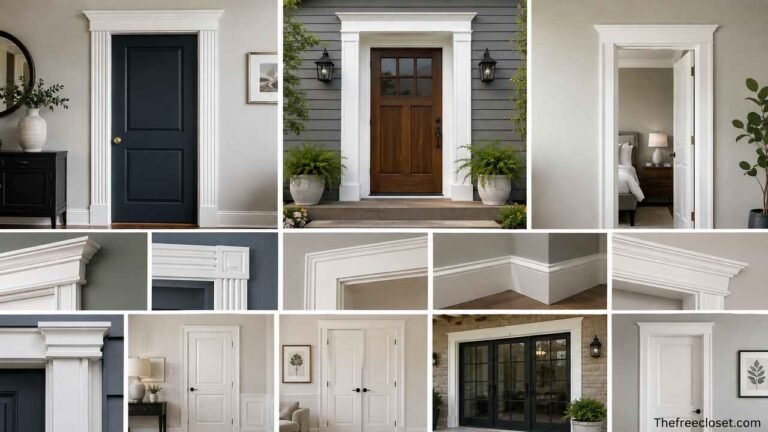
Door casing styles shape the appearance of a doorway and help connect doors with baseboards, walls, and other interior trim. Options range from simple flat casing for modern spaces to Craftsman, Colonial, farmhouse, and decorative traditional profiles.
Choose a Door Casing Style That Matches Your Interior
Start by selecting door casing that supports the overall architectural character of the room. Modern and minimalist interiors generally work well with flat, square-edged boards, while Colonial, Craftsman, Victorian, farmhouse, and other traditional interiors can accommodate more detailed profiles. The casing should look like a deliberate part of the architecture rather than decorative molding added independently around a door.
Pay attention to the door itself, baseboards, crown molding, window trim, wall paneling, and cabinetry. A simple Shaker-style door typically pairs naturally with restrained casing, while a raised-panel door can support more decorative molding. Matching every profile exactly is unnecessary, but the different trim components should share similar proportions, levels of ornamentation, and visual weight.
Room function also affects the decision. Simple profiles can keep hallways and small bedrooms visually clean, whereas formal dining rooms, entryways, libraries, and living rooms may benefit from wider or layered trim. A consistent casing can be used throughout a house, with more elaborate variations reserved for important openings.
| Door Casing Style | Typical Appearance | Suitable Interiors | Common Construction |
| Flat casing | Straight, clean edges | Modern, minimalist, transitional | Single flat board |
| Colonial casing | Curves and stepped details | Colonial, traditional | Profiled molding |
| Craftsman casing | Wide, substantial lines | Craftsman, bungalow | Flat boards with head detail |
| Farmhouse casing | Simple and slightly rustic | Farmhouse, cottage | Square-edged boards |
| Victorian casing | Ornate and layered | Victorian, historic | Multiple molding profiles |
| Mitered casing | Continuous frame appearance | Traditional, transitional | 45-degree corner joints |
| Butted casing | Strong horizontal and vertical lines | Craftsman, modern farmhouse | Square butt joints |
| Built-up casing | Deep, dimensional appearance | Formal, luxury, traditional | Multiple molding pieces |
Select Flat Casing for a Clean Modern Appearance
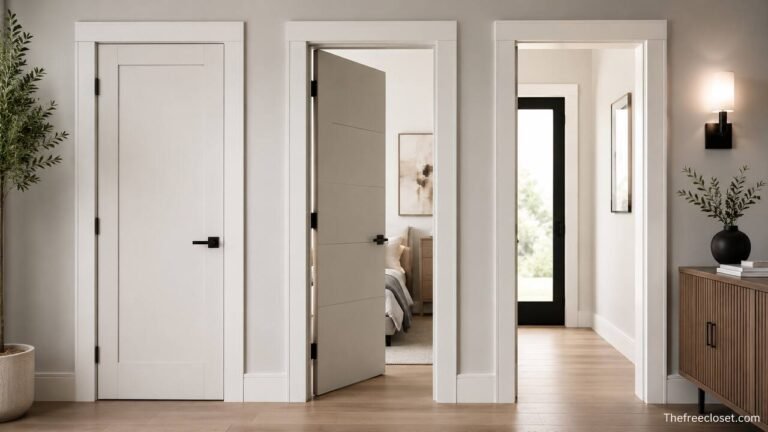
Flat casing is one of the simplest door casing styles and consists of boards with little or no decorative profiling. Its straight edges and smooth face allow the doorway to remain visually quiet. This approach is particularly effective in contemporary, Scandinavian, minimalist, and transitional spaces where complicated molding could conflict with clean architectural lines.
The boards can be narrow and subtle or comparatively wide to create a stronger frame. Square edges provide a crisp appearance, while slightly eased edges soften the profile without introducing traditional ornamentation. MDF and finger-jointed wood are common choices for painted flat casing, while solid hardwood is useful when the trim will receive a clear finish or stain.
Flat casing also works beyond strictly modern homes. A wider flat board can complement farmhouse and Craftsman interiors, especially when combined with square butt joints. Consequently, the same basic profile can produce very different results depending on its dimensions, joint configuration, color, and relationship with the baseboard.
Install Mitered Casing for a Continuous Framed Look
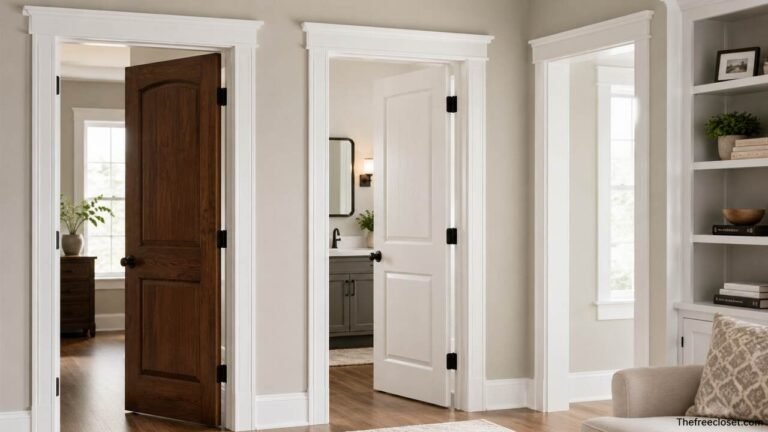
Mitered casing creates a continuous frame around a doorway by joining the two vertical side pieces to the horizontal head casing with angled cuts. The upper corners typically use 45-degree miters. When the molding contains a decorative profile, the miter allows that pattern to turn around the corner without an abrupt interruption.
Accurate cutting is particularly important because even a small discrepancy can create a visible gap at the joint. Walls, jambs, and door openings are not always perfectly square, so installers often adjust the angle slightly rather than assuming every corner is exactly 90 degrees. Proper fastening and adhesive can also help maintain a tight joint as materials respond to seasonal humidity.
This configuration is especially suitable for Colonial, traditional, transitional, and many contemporary interiors. A narrow profiled molding produces a familiar traditional appearance, whereas wide flat boards joined with miters can look distinctly modern. The joint method therefore does not determine the style by itself. The profile and proportions remain equally important.
Use Butted Casing for Craftsman and Farmhouse Doorways
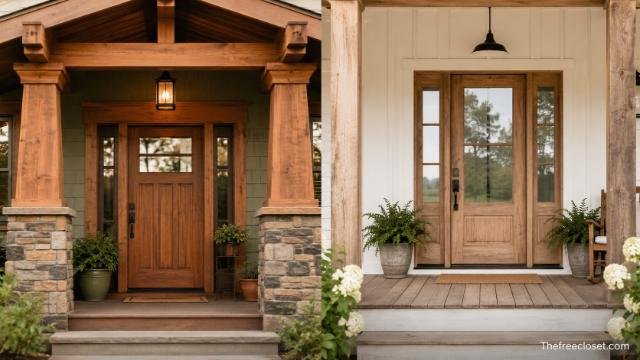
Butted casing uses square joints rather than mitered corners. The vertical pieces generally terminate beneath a horizontal head casing, producing strong horizontal and vertical lines. This construction makes the individual components visually apparent and is closely associated with Craftsman-inspired trim.
The head casing may be the same width as the side pieces or made wider and more prominent. Craftsman designs frequently add a projecting cap, small decorative fillet, or additional horizontal board above the header. Modern farmhouse versions often simplify this arrangement by using plain boards without extensive layering.
Square joints can also simplify installation because complicated profile matching is unnecessary. However, accurate measurement remains essential. Poorly aligned boards and inconsistent reveals remain visible, particularly when straight edges emphasize the geometry of the opening.
Build Craftsman Casing With Strong Architectural Proportions
Craftsman casing should give the doorway a substantial, constructed appearance. Instead of relying heavily on curved molding, this style creates interest through board width, horizontal caps, projecting edges, and carefully controlled proportions. The result works especially well with paneled doors, natural wood, and interiors featuring visible craftsmanship.
A typical arrangement includes wide vertical side casings, a horizontal header, and one or more small pieces forming a cap above the opening. Some designs include a slight overhang where the header extends beyond the vertical boards. Painted versions suit contemporary Craftsman and transitional interiors, while stained oak, fir, maple, or other woods emphasize grain and traditional workmanship.
Consistency with window trim is particularly valuable in Craftsman interiors. Door and window casings do not need identical dimensions, but using the same construction language creates continuity. Substantial baseboards can complete the composition and prevent wide door casing from appearing disproportionately heavy.
Add Colonial Casing for Traditional Interior Detail
Colonial casing usually introduces more profiling than flat or Craftsman trim. Common designs incorporate convex and concave curves, beads, stepped edges, or gently sculpted surfaces. These details create shadows around the doorway and give traditional rooms greater architectural depth.
Profiled wood, finger-jointed pine, MDF, and other paint-grade trim materials can all produce Colonial-style casing. Painted white and off-white finishes remain common because they highlight molding details while contrasting with colored walls. Stained wood can produce a warmer appearance where natural finishes are already prominent.
Colonial-inspired casing is particularly effective when coordinated with paneled doors, substantial baseboards, chair rails, wainscoting, or crown molding. Excessive combinations of unrelated profiles can make a room visually busy, however. Repeating a limited number of curves and stepped details generally creates a more coherent result.
Create Victorian Casing With Layered Decorative Profiles
Victorian-inspired casing allows considerably more ornamentation around a doorway. Instead of treating trim as a simple boundary between wall and jamb, the design can make the opening an architectural feature. Wide molding, fluted boards, corner blocks, rosettes, decorative headers, and multiple built-up layers can all contribute to the composition.
These installations require careful planning because each additional piece changes the overall width and depth. Corner blocks can eliminate mitered intersections between highly detailed moldings, while plinth blocks can create a formal transition where vertical casing meets the baseboard. Decorative headers can add further emphasis above major openings.
Victorian casing works most convincingly when surrounding architectural details support it. Ornate doorway trim placed in an otherwise extremely minimal room can feel disconnected. In historic or traditionally detailed interiors, however, richer casing can connect doors with tall baseboards, ceiling moldings, paneling, and other period-inspired features.
Apply Farmhouse Casing Without Making the Trim Too Ornate
Farmhouse casing typically relies on straightforward boards and visible proportions instead of complicated profiles. Wide vertical pieces combined with a strong horizontal header create a practical, substantial appearance. White paint is common, although stained and natural wood can introduce warmth.
A basic farmhouse arrangement may use square-edged boards around the entire opening. More detailed versions add a small cap or projecting header similar to simplified Craftsman trim. MDF, pine, poplar, and finger-jointed lumber are frequently suitable for painted applications, depending on budget and local availability.
The distinction between farmhouse and Craftsman casing can be subtle because both may use flat boards and butted joints. Farmhouse trim generally feels simpler and more casual, while Craftsman trim often uses more deliberate layering and historically influenced proportions. The surrounding doors, hardware, flooring, and wall treatment help establish the final character.
Combine Moldings to Create Built-Up Door Casing
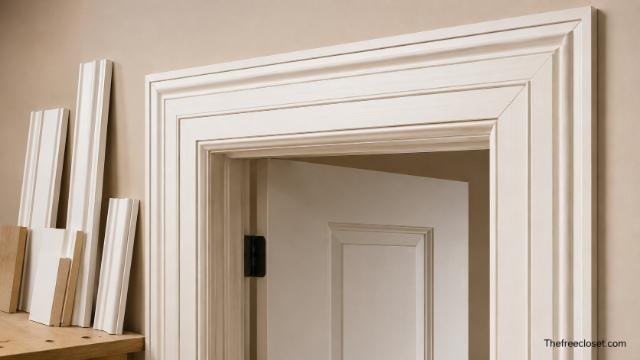
Built-up casing combines two or more trim components to produce greater width, projection, and visual depth. Instead of purchasing one extremely wide profile, an installer can place flat stock beside smaller decorative molding or layer multiple pieces around an existing casing.
Planning the total dimensions before installation is essential. Additional molding consumes wall space around the opening and may interfere with switches, outlets, cabinets, adjacent doors, or inside corners. Each layer should also project logically from the previous one so the finished assembly looks intentional.
Built-up casing is particularly effective around entry doors, formal rooms, cased openings, and oversized interior doors. It can also help create hierarchy. Standard bedroom doors might receive simple casing, while a dining-room opening uses the same base profile with an additional outer molding.
Add Rosettes and Corner Blocks for Decorative Transitions
Rosettes and corner blocks provide an alternative to conventional mitered upper corners. A decorative block sits at each upper corner, allowing the vertical and horizontal casing pieces to terminate directly against it. This arrangement can make complicated profiles easier to join while introducing additional ornamentation.
The blocks generally need to be appropriately sized in relation to the casing. A tiny rosette surrounded by broad molding can appear weak, while an oversized block may dominate the opening. Fluted casing combined with square or circular-patterned corner blocks is particularly associated with Victorian and other traditional interiors.
Corner blocks are not limited to historic reproductions. Simplified square blocks can be incorporated into eclectic or transitional trim schemes. Their success depends on repetition and compatibility with other details rather than decoration alone.
Install Plinth Blocks Where Casing Meets Baseboards
Plinth blocks create a deliberate transition at the bottom of vertical door casing. Instead of forcing a profiled baseboard to terminate directly against a differently shaped casing, both pieces can meet a rectangular block positioned near floor level.
A successful plinth block is normally thicker than the adjoining casing and baseboard so the surrounding trim terminates cleanly against its edges. Its height and width should also appear substantial enough to visually support the vertical casing. Decorative versions may contain routed profiles, while simpler blocks remain completely flat.
Plinths are particularly useful with elaborate Victorian and traditional trim because several molding profiles may converge near the floor. They can also be used selectively in modern interpretations of classical interiors. In very minimalist rooms, however, eliminating the block often maintains cleaner lines.
Size Door Casing to Fit the Door and Wall
Casing width should be proportional to the door, ceiling height, baseboards, and available wall space. Standard residential trim can use relatively modest widths, while tall doors, high ceilings, and large rooms often accommodate broader casing without appearing crowded.
Thickness matters as well as width. Casing needs sufficient depth to create a clean transition between the jamb and wall surface. Its relationship with baseboard thickness becomes particularly noticeable at the bottom of an opening. Where profiles do not meet cleanly, a plinth block or adjusted trim thickness can resolve the transition.
Do not select dimensions by looking at the doorway alone. Measure the wall area beside the opening, distance to nearby corners, light switches, cabinetry, and neighboring doors. Wide casing may look excellent on an isolated doorway but become impractical when several openings are closely spaced.
| Design Factor | Narrower Casing Tends to Do | Wider Casing Tends to Do |
| Visual impact | Keeps doorway understated | Makes doorway more prominent |
| Small rooms | Preserves visual space | Can appear substantial or crowded |
| Tall ceilings | May look undersized | Often improves proportion |
| Modern design | Supports minimal detailing | Creates bold architectural framing |
| Traditional design | Works with restrained profiles | Accommodates richer profiles |
| Wall clearance | Requires less space | Requires careful measurement |
| Baseboard relationship | Suits modest baseboards | Often pairs with taller baseboards |
Coordinate Door Casing With Baseboards and Window Trim
Treat door casing, baseboards, and window trim as parts of one visual system. They should share enough characteristics to make the interior feel cohesive. Similar thicknesses, compatible profiles, repeated edge details, or consistent finishes can provide this connection.
The point where baseboard meets casing deserves special attention. A thick baseboard running into thin door trim can create an awkward projection. Installers can solve the issue by selecting compatible thicknesses, changing the baseboard termination, or introducing plinth blocks.
Window casing offers another opportunity for repetition. Using the same flat stock around windows and doors creates immediate consistency in modern rooms. Traditional interiors can repeat a related molding profile while allowing door headers or important openings to receive additional detail.
Select Wood, MDF, or Composite Casing for the Application
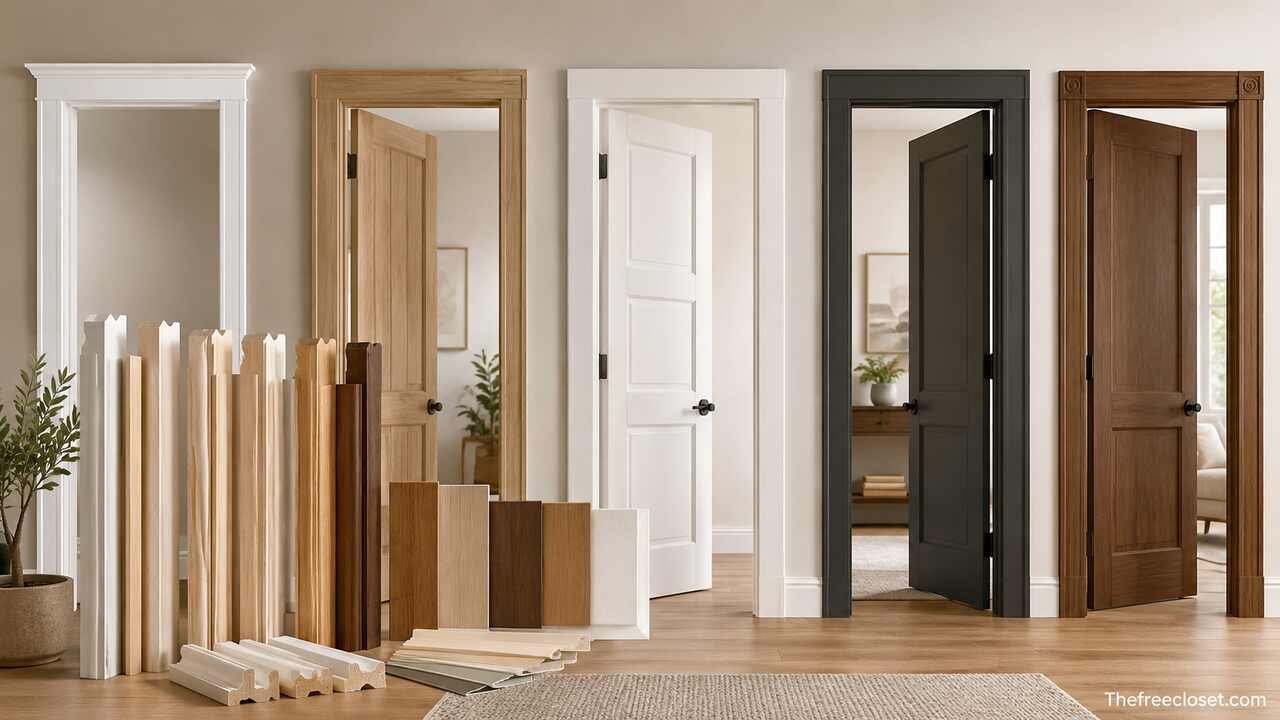
Choose casing material according to finish, location, budget, durability requirements, and desired appearance. Solid wood remains valuable when visible grain is part of the design. Poplar and pine are common interior choices, while oak, maple, cherry, and other hardwoods can provide distinctive grain for stained or clear-coated trim.
MDF provides a smooth, consistent surface that accepts paint well and is widely used for interior molding. It does not contain natural knots or grain variation, which helps create uniform painted profiles. Moisture exposure should be considered carefully because conventional MDF is generally less suitable for persistently damp conditions than appropriately selected moisture-resistant products.
Finger-jointed wood offers another paint-grade option. Small wood sections are joined together to create stable trim lengths, and paint conceals the joints. PVC and other composite trim materials may be useful where moisture resistance is especially important, although their appearance and installation characteristics differ from conventional wood.
Match the Casing Finish With Doors, Walls, and Hardware
Finish determines whether casing blends into the room or becomes a contrasting frame. White and off-white painted trim remains versatile because it can provide separation from colored walls and coordinate easily with many door styles. Painting casing and walls the same color creates a quieter, more integrated appearance.
Stained casing highlights natural wood grain and works particularly well in Craftsman, rustic, traditional, and mid-century-influenced interiors. The wood does not necessarily need to match flooring or furniture exactly. Compatible undertones and a controlled number of wood colors can create a more natural composition than attempting an imperfect exact match.
Door hardware also influences the final result. Black hardware can add contrast to light painted casing, while brass, bronze, nickel, and chrome can shift the doorway toward traditional or contemporary styling. Casing should provide the architectural frame while hardware supplies a smaller layer of functional detail.
Measure the Door Opening Before Buying Casing
Measure every doorway individually rather than assuming all openings have identical dimensions. Record the height and width, determine the intended reveal along the jamb, and calculate the required lengths based on the selected joint style.
Also inspect wall conditions. Drywall may project beyond the jamb in certain areas, corners may not be square, and floors can vary slightly in level. These irregularities affect how casing sits against both the jamb and wall. Identifying them before cutting reduces the risk of open joints and uneven trim.
Material quantities should include an allowance for cutting and occasional errors. Patterned profiles deserve particular attention because replacement pieces need to match the existing molding. When renovating an older home, confirm that the selected profile and dimensions are actually available before removing trim that must be replicated.
Cut and Join the Casing According to Its Profile
Use the casing profile to determine the most appropriate joint. Mitered joints allow continuous decorative patterns to turn around corners, whereas square butt joints complement flat stock and Craftsman-style assemblies. Corner blocks provide another solution for ornate profiles.
Dry-fitting pieces before final fastening helps expose problems early. Check the reveal around the jamb, upper corner joints, relationship to the floor, and connection with baseboards. Small corrections are much easier before the trim has been nailed, filled, caulked, and painted.
Natural wood casing requires additional attention because filler and caulk cannot conceal mistakes as easily as they can with painted trim. Accurate cuts, grain selection, sanding, and tight joints become part of the visible finished surface.
Maintain a Consistent Reveal Around the Door Jamb
Set casing slightly back from the inside edge of the door jamb rather than positioning it randomly. This setback creates a reveal, a narrow visible strip of jamb around the opening. Keeping that line consistent produces a cleaner, more professional-looking installation.
Marking the reveal before placing the casing provides a reliable reference. The precise dimension can vary according to trim design and site conditions, but consistency matters more than choosing an unusually large or small setback.
The reveal also helps accommodate hinge hardware and minor irregularities around the opening. More importantly, it creates a clear visual boundary between jamb and casing. Even expensive molding can look poorly installed when this line varies noticeably from one side of the doorway to the other.
Finish Painted Casing for Smooth, Defined Edges
Prepare painted casing carefully because paint does not automatically hide installation defects. Fill nail holes, address visible joints, sand repaired areas, and use suitable caulk where painted trim meets walls or where small stationary gaps require finishing.
Primer may be required for unfinished wood or MDF, while some trim products arrive pre-primed. The final paint system should be appropriate for interior trim and capable of handling routine contact and cleaning. Satin, semi-gloss, and other durable trim finishes are commonly chosen depending on the desired sheen.
Clean edge work is particularly important with contrasting wall colors. A dark wall beside white casing emphasizes every boundary, while monochromatic trim and walls are more forgiving visually. Careful preparation therefore contributes as much to the finished appearance as the casing profile itself.
Use Different Door Casing Styles to Establish Visual Hierarchy
Not every doorway needs identical treatment. A consistent base style can be maintained throughout a house while important openings receive greater emphasis. For example, bedroom doors might use straightforward flat casing while the opening between an entry and living room adds a more substantial header.
The variations should remain related. Repeating the same board thickness, edge treatment, paint color, or core profile prevents upgraded openings from looking disconnected. This strategy is particularly useful in homes that combine casual private spaces with more formal public rooms.
Open passages without doors can also receive casing. These cased openings often become natural opportunities for stronger architectural detailing because there is no door slab or hardware competing for attention. Wider trim or a built-up header can frame the transition between rooms.
Avoid Common Door Casing Design and Installation Mistakes
Avoid selecting casing solely from a small molding sample. A profile that appears subtle in a store can look ornate when installed around an entire doorway, while narrow molding can appear undersized in a tall room. Evaluate the complete dimensions and, when practical, mock up a section around the actual opening.
Another frequent problem is combining too many unrelated trim styles. Ornate Colonial casing, minimalist baseboards, rustic doors, and highly decorative crown molding can compete with one another. Repeating compatible shapes and proportions creates a stronger result.
Installation details can undermine even a well-chosen style. Open miters, inconsistent reveals, poorly aligned butt joints, excessive caulk, exposed nail holes, and awkward baseboard transitions draw attention away from the design. Accurate preparation and finishing allow the intended casing style to remain the focus.
Finalize Door Casing Styles With the Entire Room in Mind
The best door casing styles do more than cover the joint between a door jamb and wall. They establish proportion, reinforce architectural character, connect doorways with windows and baseboards, and determine how strongly an opening contributes to the room.
Flat and mitered casing can support modern and transitional interiors, while butted boards provide a strong foundation for Craftsman and farmhouse designs. Colonial profiles introduce traditional curves, Victorian combinations provide richer ornamentation, and built-up assemblies can turn important openings into architectural focal points.
Before making the final selection, compare the casing with the door style, baseboard height, window trim, ceiling height, wall dimensions, finish, and available space around the opening. When profile, material, dimensions, joints, and finish work together, door casing becomes an integrated architectural detail rather than an isolated piece of molding.
Discover the latest fashion trends, home ideas, travel tips, and lifestyle inspiration at thefreecloset.com.
FAQ’s
Flat casing with square or slightly eased edges is one of the strongest choices for modern interiors. Simple profiles, controlled proportions, and minimal ornamentation complement clean doors and contemporary architecture.
Wide flat side boards combined with a horizontal header and optional projecting cap suit Craftsman interiors. Square butt joints are commonly more appropriate than ornate mitered molding.
Door casing and baseboards do not need identical profiles, but they should coordinate in thickness, scale, finish, and architectural character. Their connection at the bottom of the doorway should appear deliberate.
Yes. Related variations can establish hierarchy between rooms. Keeping a consistent finish, material, edge detail, or core profile helps different casing treatments remain visually connected.
MDF is useful for smooth painted trim, while solid wood is preferable when natural grain will remain visible through stain or a clear finish. Location, moisture exposure, durability expectations, budget, and desired finish should guide the choice.
The appropriate width depends on door size, ceiling height, baseboard dimensions, architectural style, and available wall space. Wider casing generally creates stronger visual emphasis, while narrower casing keeps the doorway understated.