
Cleaning Hacks for a Faster, Easier, and More Effective Home Cleaning Routine
Cleaning hacks save time and effort by using the right methods for different types of dirt, such as grease, dust, stains, and mineral buildup. It highlights simple tools and products like microfiber cloths, dish soap, baking soda, and vinegar, while stressing proper cleaning order and surface safety.
Gather the Right Cleaning Supplies Before You Start
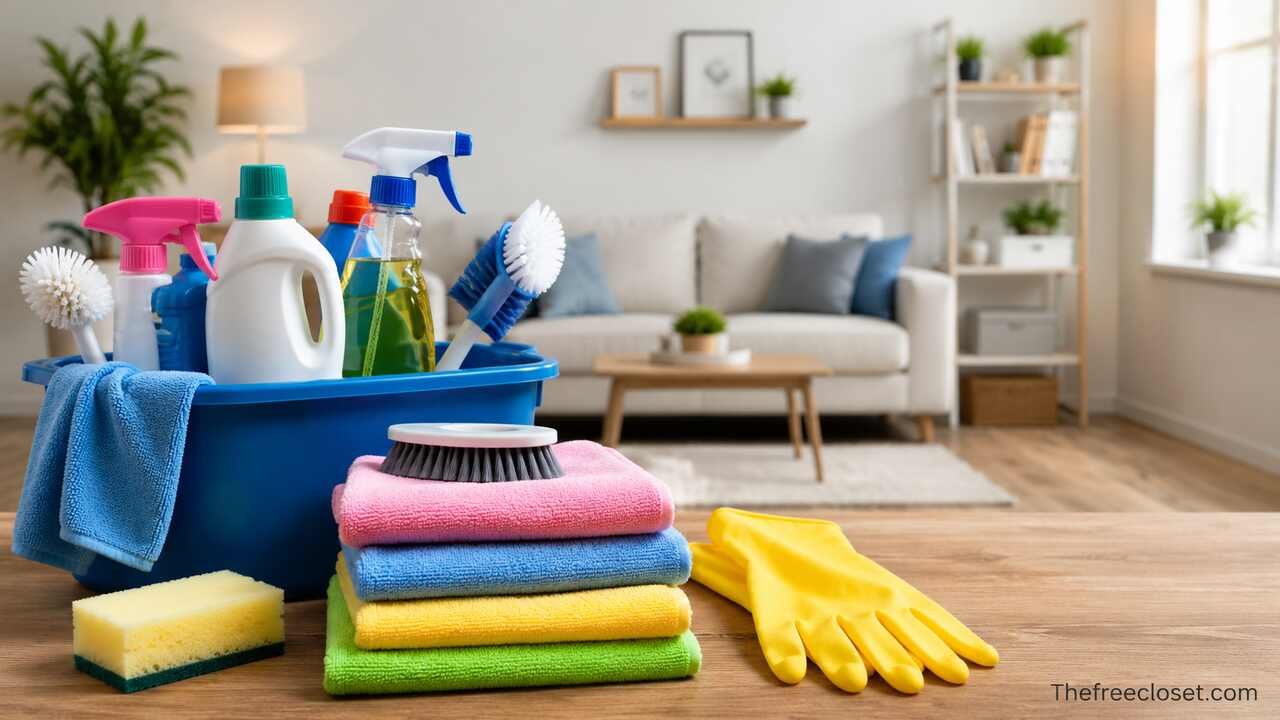
Prepare your cleaning supplies before moving from room to room. Keeping frequently used products together reduces interruptions and makes it easier to complete several related tasks in one session. A basic kit can include microfiber cloths, dish soap, baking soda, white vinegar, a soft brush, an old toothbrush, a squeegee, rubber gloves, a vacuum attachment, spray bottles, and a general-purpose cleaner suitable for your surfaces.
Match each cleaning tool to the material you are treating. Microfiber works well for dust, glass, stainless steel, and many sealed surfaces. A soft-bristle brush can loosen residue from grout, tile, sinks, and textured materials. A non-scratch sponge provides controlled abrasion for cookware and bathroom fixtures. Vacuum crevice tools reach baseboards, furniture seams, window tracks, and tight spaces where ordinary dusters struggle.
Avoid assuming that one cleaning mixture is suitable for everything. Natural stone, unfinished wood, certain metals, electronics, upholstery, and specialty coatings may require manufacturer-approved methods. Never mix bleach with ammonia, vinegar, acids, or other household cleaners because dangerous gases can form. When trying any unfamiliar cleaning method, test it on a small hidden area first.
| Cleaning Supply | Best Uses | Important Precaution |
| Microfiber cloth | Dust, glass, stainless steel, counters | Wash without fabric softener for better absorption |
| Dish soap | Grease, counters, cabinet fronts | Use diluted amounts on most surfaces |
| Baking soda | Odors, gentle scrubbing, sink residue | Avoid aggressive rubbing on delicate finishes |
| White vinegar | Mineral deposits, some glass surfaces | Avoid natural stone and acid-sensitive materials |
| Soft brush | Grout, corners, textured surfaces | Choose non-scratch bristles |
| Squeegee | Shower glass, mirrors, windows | Wipe blade between passes |
| Vacuum attachments | Crevices, upholstery, baseboards | Use the correct attachment for delicate fabric |
Clean From Top to Bottom to Prevent Repeated Work
Start every room at the highest practical point and finish with the floor. Dust from ceiling fans, shelves, blinds, light fixtures, and furniture naturally falls downward. Cleaning lower surfaces first means you may have to clean them again after dust from higher areas settles.
Begin by removing cobwebs and dust from ceiling corners, light fixtures, vents, fan blades, curtain rods, and upper shelves. Move next to tables, counters, cabinets, furniture, windowsills, and baseboards. Vacuum or sweep the floor only after loose dust and debris have been displaced from everything above it. Finish with mopping or another appropriate floor treatment.
The same sequence works on a smaller scale. When cleaning a kitchen cabinet, wipe the upper shelf before the lower shelf. When cleaning a shower, treat the upper wall before the tub or shower floor. This simple direction-based cleaning hack saves time because gravity becomes part of the cleaning process rather than an obstacle.
Remove Dust With Damp Microfiber Instead of Spreading It Around
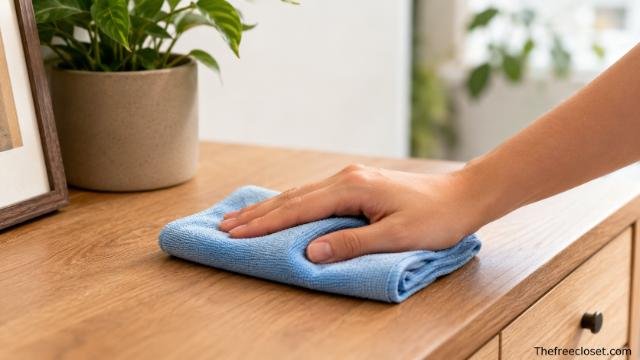
Use a slightly damp microfiber cloth when cleaning most washable hard surfaces. Dry feather dusters can move particles into the air, while microfiber fibers capture fine dust and hold it until the cloth is washed. Light moisture can improve particle pickup without leaving the surface visibly wet.
Fold the cloth into quarters before starting. Each fold provides several clean surfaces that can be rotated as the cloth becomes dirty. Wipe rather than aggressively rub. For heavily dusty areas, vacuum first and follow with microfiber. Electronics require extra care, so turn equipment off and follow manufacturer instructions before using any moisture nearby.
Regular dust removal improves more than appearance. Dust accumulates on vents, fans, electronics, blinds, shelves, and baseboards, where it can combine with humidity and grease to create stubborn grime. Removing it while it is still loose prevents more difficult cleaning later.
Use Dish Soap to Break Down Kitchen Grease
Dilute a small amount of dish soap in warm water to clean many greasy kitchen surfaces. Dishwashing liquid contains surfactants that help separate oils from surfaces so they can be carried away with water. This makes it useful for cabinet fronts, backsplashes, range hoods, washable countertops, and other grease-prone areas when the material permits.
Apply the solution with a microfiber cloth rather than flooding the surface. Allow stubborn grease a short contact period before wiping. Follow with a clean damp cloth to remove soap residue, then dry the surface. For textured cabinet hardware or corners, use a soft toothbrush to loosen buildup around edges.
Kitchen grease becomes harder to remove when it combines with airborne dust. Wiping cooking areas frequently prevents this sticky film from developing. Pay particular attention to cabinet handles, microwave doors, refrigerator handles, stove controls, and the wall immediately surrounding the cooking area.
Loosen Microwave Grime With Steam Before Scrubbing
Soften dried food inside the microwave with steam instead of immediately scrubbing it. Place a microwave-safe bowl of water inside the appliance and heat it until the interior becomes steamy. Leave the door closed briefly so the moisture can soften splatters.
Carefully remove the hot bowl, then wipe the ceiling, walls, door, and turntable with a damp cloth. A small amount of dish soap can help remove greasy residue. Wash the removable turntable separately if the manufacturer allows it. Pay attention to the door seal and surrounding frame, where food particles can collect.
Steam works because dried residue absorbs moisture and becomes easier to lift. The same general principle can reduce scrubbing on many water-resistant surfaces, but appliances should always be treated according to their care instructions. Never soak electrical components or spray excessive liquid directly into vents.
Degrease the Range Hood and Filters Regularly
Clean the range hood before grease becomes thick and sticky. Wipe exterior surfaces with warm water and diluted dish soap or another cleaner approved for the hood material. Stainless steel should generally be wiped in the direction of its grain to reduce streaking.
Removable metal grease filters can often be washed with hot water and degreasing dish soap, although the appliance manual should determine the correct method. Allow filters to dry completely before reinstalling them. Replace disposable filters according to manufacturer recommendations rather than attempting to wash materials designed for single use.
A clean range hood performs an important preventive function. The hood captures airborne grease and cooking particles that would otherwise settle on cabinets, ceilings, walls, and nearby appliances. Maintaining it therefore reduces cleaning demands throughout the surrounding kitchen.
Freshen the Garbage Disposal Without Damaging It
Keep the garbage disposal clean by flushing it appropriately and removing trapped residue rather than relying heavily on fragrance. With the disposal off, clean the rubber splash guard where food particles often collect. Use dish soap and a brush that keeps your hands safely away from the grinding area.
Cold running water is commonly recommended while many disposals operate because it helps carry food particles through the system. Follow the manufacturer’s instructions for your exact unit. Avoid inserting hands into the disposal, and never attempt to clear a jam without disconnecting power according to the appliance’s safety procedure.
Odor usually indicates lingering organic material rather than a lack of scent. Cleaning the splash guard, avoiding unsuitable waste, and flushing the unit properly often addresses the source more effectively than simply masking the smell.
Deodorize the Refrigerator With Baking Soda and Regular Wiping
Remove expired food and spills before trying to control refrigerator odors. Odor absorbers cannot compensate for spoiled food or liquid trapped beneath drawers. Empty one shelf at a time so refrigerated items remain out of the appliance for as little time as possible.
Wash removable shelves and bins according to manufacturer instructions, especially if they are glass because sudden temperature changes can cause damage. Wipe interior walls with an appropriate mild cleaning solution. Dry surfaces before returning food. An open container of baking soda can help absorb some persistent odors once the refrigerator itself is clean.
Preventive organization also acts as a cleaning hack. Store foods that may leak inside trays or containers, label leftovers, and place older items where they are visible. These habits reduce unnoticed spills and make routine refrigerator cleaning much faster.
Remove Sink Residue With Gentle Abrasion
Clean sinks according to their material rather than using the strongest available scrubber. Baking soda can provide mild abrasion on many compatible surfaces, helping lift residue without the aggressive scratching associated with coarse scouring products.
Sprinkle a small quantity onto a damp sink and work it gently with a soft sponge. Rinse thoroughly and dry afterward. Stainless-steel sinks often look brighter when wiped dry because water droplets otherwise leave mineral marks. Faucets may require a different treatment if they have special finishes.
Pay special attention to the drain rim, faucet base, overflow opening, and seams where residue collects. Small brushes are particularly useful in these tight areas. Frequent light cleaning is more effective than allowing soap, minerals, food residue, and grease to harden into a single stubborn layer.
Dissolve Hard-Water Deposits With an Appropriate Mild Acid
Treat mineral deposits with an acidic cleaner only when the affected material can tolerate acid. White vinegar or citric-acid solutions can help dissolve calcium-based deposits on some glass, chrome, ceramic, and similar surfaces.
Apply the product to the mineral buildup, give it sufficient contact time, and then wipe or gently scrub. Rinse thoroughly afterward. Avoid vinegar on marble, limestone, travertine, and other acid-sensitive natural stones because acid can etch the surface. Some specialty faucets and plated finishes also require manufacturer-approved products.
Hard-water deposits are easier to prevent than remove. Dry faucets, shower glass, and sinks after use when practical. Removing water droplets before evaporation interrupts the process that leaves concentrated mineral residue behind.
Keep Shower Glass Clear With a Squeegee
Run a squeegee over shower glass after bathing. This takes less than a minute and removes much of the water that would otherwise dry into mineral spots and soap residue. A microfiber cloth can handle corners and hardware the squeegee cannot reach.
For existing buildup, use a cleaner appropriate for your glass and surrounding materials. Allow the product to work before scrubbing rather than immediately applying excessive pressure. Rinse and dry the glass after cleaning. Avoid abrasive tools that may scratch coated or specialty glass.
Ventilation also influences shower cleanliness. Running an exhaust fan and allowing wet surfaces to dry can reduce the damp conditions that support mildew. The combination of moisture removal and ventilation is one of the most effective low-effort bathroom cleaning strategies.
Clean Grout With a Small Brush and Suitable Cleaner
Target grout lines individually rather than repeatedly washing the entire tiled surface. Grout’s texture can trap soap residue and soil that a flat mop or sponge does not fully reach. A narrow soft or medium brush can concentrate cleaning action where it is needed.
Apply a grout-compatible cleaner, allow appropriate dwell time, and brush the lines in small sections. Rinse away loosened residue and change cleaning water when it becomes dirty. Sealed grout may have different care requirements from unsealed grout, while natural-stone installations often require pH-neutral products.
Darkened grout is not always simply surface dirt. Persistent discoloration, crumbling material, or moisture problems can indicate damaged sealant, failing grout, or another maintenance issue. Cleaning improves appearance, but damaged materials may require repair rather than stronger chemicals.
Remove Soap Scum Before It Hardens
Clean soap scum while the layer is thin. Soap residue combines with minerals in water and body oils, producing a cloudy film that can adhere strongly to tubs, doors, tile, and fixtures.
Use warm water and a cleaner suitable for the surface. Allow the cleaner enough time to loosen the film, then wipe or gently scrub. Rinse thoroughly so cleaning product does not become another residue layer. A squeegee or towel can remove water afterward.
Switching from heavy bar-soap residue to easily rinsed products may reduce buildup in some bathrooms, although water hardness remains an important factor. Regardless of product choice, frequent rinsing and drying substantially reduces the amount of material that later requires scrubbing.
Refresh Showerheads by Removing Mineral Buildup
Inspect showerhead nozzles when spray patterns become uneven. Mineral deposits can partially block openings, reducing water flow and redirecting individual streams.
If the manufacturer permits descaling, remove the showerhead or treat affected components using the recommended method. Some people use diluted vinegar for compatible fixtures, but specialty metals and finishes can react poorly to acids. Silicone spray nozzles can sometimes be cleared gently by rubbing them with a finger after deposits soften.
Cleaning the showerhead improves more than cosmetic appearance. Clear nozzles distribute water more evenly and prevent small deposits from developing into significant blockages. Regular wiping of the fixture after showers can reduce future mineral accumulation.
Clean Toilet Surfaces From Least Dirty to Most Dirty
Use a deliberate sequence when cleaning the toilet to avoid transferring contamination. Start with nearby cleaner areas, then clean the flush handle, tank, lid, outer surfaces, seat, hinges, rim, and bowl according to your preferred hygiene protocol and product instructions.
Use separate cloths or disposable materials where appropriate, and do not take toilet-cleaning cloths directly to kitchen or food-preparation surfaces. Apply bowl cleaner under the rim, allow the stated contact time, then scrub with a toilet brush. Disinfectants only achieve their intended effect when their label instructions, including contact time, are followed.
The hinges and base often receive less attention than the bowl, yet these locations can collect dust, splashes, and residue. A small brush can reach around hardware and seams, while regular floor cleaning around the toilet prevents grime from accumulating where the fixture meets the floor.
Clear Bathroom Mirrors With Minimal Product
Clean mirrors with a light application rather than saturating them. Excess cleaner can run toward the mirror edges, create streaks, and potentially affect backing or surrounding materials over time.
Apply a glass-safe product to a microfiber cloth rather than spraying large quantities directly onto the mirror. Wipe systematically from top to bottom. Use a second dry microfiber cloth if needed to remove remaining streaks.
Many mirror streaks come from residue already on the glass, including hair spray, toothpaste, cosmetics, and previous cleaning products. If ordinary glass cleaner appears to smear rather than clean, remove the greasy residue first and then polish the surface.
Vacuum Upholstery Before Treating Fabric Stains
Remove dry debris from sofas and chairs before applying moisture. Vacuum cushions, seams, crevices, and areas beneath removable sections using an appropriate upholstery attachment. This prevents loose crumbs, hair, and dust from turning into wet grime during spot treatment.
Check the upholstery care label before using any cleaning solution. Different fabrics may require water-based products, solvent cleaners, professional care, or very limited moisture. Blot stains rather than rubbing them outward, and test cleaning products in a hidden location first.
Rotating removable cushions can also improve cleanliness and wear distribution. Vacuuming furniture during routine floor cleaning takes only a few additional minutes and prevents large accumulations of pet hair, food debris, and dust from becoming deeply embedded.
Lift Carpet Spills by Blotting Instead of Scrubbing
Blot carpet spills immediately with a clean absorbent cloth. Apply gentle downward pressure so liquid transfers into the cloth. Scrubbing can spread the stain, distort carpet fibers, and push material deeper into the pile.
Select a cleaning treatment based on the spill and carpet type. Use only products compatible with the carpet manufacturer’s guidance. Work from the outside of the affected area toward the center to limit spreading. Avoid soaking the backing because excessive moisture can cause additional problems.
Different stains require different chemistry, so there is no universal carpet hack. Oil, coffee, pet accidents, ink, and mud behave differently. The universal principle is speed: removing excess material promptly usually gives you a better chance of preventing permanent discoloration.
Remove Pet Hair With Multiple Cleaning Methods
Combine vacuuming with manual hair-lifting techniques when pet hair clings to upholstery or rugs. A vacuum with an appropriate pet or upholstery tool removes loose hair efficiently, while a slightly damp rubber glove or specialized reusable hair tool can gather strands that cling to fabric.
Work in short strokes so hair collects into manageable clumps. Empty vacuum canisters and clean rollers frequently because wrapped hair can reduce cleaning performance. Check furniture tags before introducing moisture, even in small amounts.
Reducing airborne and loose fur also makes other household cleaning easier. Regular pet grooming, washable throws, and frequent vacuuming prevent hair from migrating into corners, HVAC returns, bedding, and clothing.
Dust Blinds With a Microfiber Cloth or Vacuum Attachment
Close blinds in one direction and clean the exposed surfaces systematically. Rotate the slats and repeat on the opposite side. This method is faster than trying to manipulate every slat individually from multiple angles.
A microfiber cloth works well for many washable blinds, while a vacuum with a soft brush attachment is useful for heavy dry dust. Fabric shades, wood blinds, and specialty window coverings may require different care. Avoid saturating wooden or delicate materials.
Window coverings collect airborne dust because they sit directly in air currents and sunlight. Regular light cleaning prevents a thick layer from developing and reduces the amount of dust released each time blinds are adjusted.
Clean Window Tracks With Vacuuming Before Moisture
Vacuum loose dirt from window tracks before wiping them with liquid cleaner. Dust, insects, leaves, and grit are much easier to remove while dry. Adding water too soon can turn the debris into muddy residue.
After vacuuming, use a damp microfiber cloth or small brush to loosen remaining grime. Wrap the cloth around a narrow tool if necessary to reach corners, taking care not to damage seals or mechanisms. Dry the track after cleaning.
Inspect drainage openings while working around windows. Dirt can sometimes obstruct channels intended to move water away from the frame. Keeping these areas clean helps the window system function as designed.
Wipe Baseboards With Microfiber After Vacuuming
Vacuum baseboards using a brush attachment before wiping them. This removes loose dust and hair, allowing the damp cloth to address adhered dirt instead of pushing dry debris along the trim.
Use a mild cleaner suitable for the paint or finish. Pay attention to corners, door frames, and areas near heating vents, which often accumulate heavier dust. Dry the surface afterward when appropriate.
Baseboards are easier to maintain when included in regular cleaning rotation rather than treated as an occasional deep-cleaning project. Cleaning one or two rooms each week distributes the workload and prevents the entire home from needing baseboard attention at once.
Clean Ceiling Fans Without Dropping Dust Everywhere
Turn the ceiling fan off completely before cleaning it. Place a washable pillowcase over each blade and gently pull it toward the edge so loose dust remains inside the case rather than falling across furniture and flooring.
Alternatively, vacuum blades with a suitable attachment and follow with a microfiber cloth. Clean the upper surface carefully because that is where most dust collects. Avoid putting excessive weight on blades, which can affect balance.
Ceiling fans can redistribute accumulated dust whenever they run. Cleaning them periodically therefore supports the cleanliness of furniture and floors below, not just the appearance of the fan itself.
Remove Mattress Dust With Thorough Vacuuming
Strip the bed and vacuum the mattress surface, seams, and edges with an upholstery attachment. Pay particular attention to stitched areas where dust and debris can collect.
If the mattress manufacturer permits it, spot-clean stains with minimal moisture and allow the mattress to dry completely before replacing bedding. Avoid saturating foam or internal materials. Rotating the mattress according to its manufacturer instructions may also help distribute wear.
Wash bedding according to fabric care instructions while the mattress is being cleaned. Combining both tasks creates a more complete bedroom refresh and prevents freshly washed sheets from being placed over an unnecessarily dusty sleep surface.
Neutralize Household Odors by Cleaning the Source
Find the odor source before adding air freshener. Common sources include garbage containers, refrigerator spills, damp towels, pet areas, drains, upholstery, shoes, and food residue beneath appliances.
Remove the contaminated material, wash the surrounding area appropriately, and improve airflow if needed. Baking soda can absorb some odors in dry applications, while activated carbon products can help in certain enclosed areas. Fragrance can be used afterward if desired, but it should not replace removal of the underlying source.
Persistent musty odors deserve special attention because they may indicate ongoing moisture. If an odor repeatedly returns after cleaning, inspect for leaks, damp building materials, condensation, or ventilation problems rather than continually masking the smell.
Disinfect High-Touch Surfaces After Cleaning Them
Remove visible soil before disinfecting frequently touched surfaces such as doorknobs, handles, switches, remote controls, bathroom fixtures, and selected work surfaces. Dirt and grease can interfere with some disinfectants, so cleaning and disinfecting serve related but different purposes.
Choose a disinfectant appropriate for the surface and follow its label exactly. The surface may need to remain visibly wet for a specified period to achieve the claimed effect. Electronics need special care because excess moisture can damage internal components.
Routine disinfection does not mean every household surface requires constant chemical treatment. Prioritize areas touched by many hands, bathrooms, food-related contamination where appropriate, and situations involving illness. Ordinary cleaning is sufficient for many low-risk surfaces during normal daily life.
Organize Cleaning Tasks Into Short Daily Sessions
Divide cleaning into small recurring tasks rather than saving everything for a major cleaning day. Five to fifteen minutes of focused maintenance can prevent several hours of deep cleaning later.
For example, wipe kitchen counters after meals, squeegee shower glass after use, return objects to their proper locations at night, clean the sink before bed, and vacuum high-traffic areas regularly. Assign less frequent tasks such as fan cleaning, window tracks, refrigerator shelves, and baseboards to a weekly or monthly rotation.
This approach works because dirt accumulation is cumulative. When grease, dust, minerals, and clutter remain for weeks, each layer makes the next layer harder to remove. Frequent maintenance interrupts that cycle.
| Frequency | Useful Cleaning Tasks |
| Daily | Wipe counters, wash dishes, clear clutter, wipe sinks, spot-clean spills |
| Several times weekly | Vacuum busy areas, clean stovetop, refresh bathroom surfaces |
| Weekly | Mop floors, clean toilets, dust furniture, change bedding |
| Monthly | Clean baseboards, blinds, vents, appliances, window tracks |
| Seasonally | Deep-clean storage areas, wash selected textiles, clean behind major furniture |
Use Two Baskets to Speed Up Room-by-Room Cleaning
Carry two baskets or containers while tidying. Use one for items that belong elsewhere in the home and another for rubbish, recycling, or objects requiring a separate decision.
Complete the physical cleaning of the room before distributing items from the relocation basket. Constantly walking individual objects to other rooms interrupts momentum and can lead to distraction. Grouping them keeps the cleaning process focused.
This method is particularly useful in family homes, bedrooms, living rooms, and multipurpose spaces. It separates tidying from cleaning while still allowing both tasks to happen during the same session.
Let Cleaning Products Work Before You Scrub
Give appropriate cleaning products time to interact with the soil before applying physical effort. Many cleaners perform better when they remain on the surface for the contact period listed on the label.
Apply cleaner to compatible shower walls, stovetop residue, sink deposits, or other problem areas and work elsewhere briefly while the product acts. Return afterward and wipe or scrub. This technique can significantly reduce the amount of pressure needed.
More contact time is not automatically better. Strong products can damage finishes if left too long, and disinfectants have specific directions. Follow the product label rather than creating an arbitrary soaking period.
Separate Cleaning Cloths by Area to Reduce Cross-Contamination
Assign different cloths to kitchens, bathrooms, general dusting, and other cleaning categories. Color coding can make the system simple: for example, one color for bathrooms and another for food-preparation areas.
Wash reusable cloths thoroughly after use and allow them to dry completely. Avoid repeatedly cleaning with a dirty cloth because it redistributes residue rather than removing it. Replace or wash cloths during a cleaning session once they become heavily soiled.
This system is especially valuable around toilets, raw food preparation areas, and pet messes. The goal is to prevent a tool used on a heavily contaminated surface from immediately being used somewhere cleaner.
Protect Stainless Steel by Following the Grain
Examine stainless-steel appliances closely to identify the direction of the grain, then wipe in the same direction. This produces a more uniform finish and reduces visible streaks.
Start by removing grease with a small amount of suitable cleaning solution. Follow with a clean damp cloth when necessary, then dry and buff with microfiber. Avoid harsh abrasive pads that may scratch the finish.
Fingerprints are easier to control when handles are cleaned frequently. Rather than polishing an entire refrigerator every day, wipe the high-touch areas regularly and perform full-surface cleaning less often.
Maintain Floors According to Their Material
Match floor-cleaning methods to the flooring material. Tile, sealed hardwood, laminate, vinyl, natural stone, and carpet have different tolerances for water, acids, abrasives, and cleaning chemicals.
Vacuum or sweep first so grit does not scratch the floor during mopping. Use only the amount of moisture needed, particularly on wood and laminate. Change dirty mop water or pads during the job rather than spreading contaminated water across additional rooms.
Entry mats provide an additional cleaning hack by stopping soil before it spreads. Mats placed inside and outside frequently used entrances can reduce grit, mud, and moisture carried onto floors.
Clean Tools After Every Cleaning Session
Wash the tools that clean your home. Dirty mop heads, vacuum filters, brushes, sponges, and microfiber cloths can reduce cleaning performance and redistribute debris the next time they are used.
Empty vacuum bins before they become overfilled, remove hair from brush rollers, and maintain filters according to the appliance manual. Rinse brushes and allow them to dry. Launder microfiber according to care instructions and avoid products that coat the fibers and reduce absorbency.
A clean tool requires less effort to produce the same result. Tool maintenance also makes it easier to start the next cleaning session because supplies are already ready for use rather than covered in residue from the previous job.
Store Cleaning Products Safely and Efficiently
Keep everyday cleaning products organized in a portable caddy or a designated cabinet. Store heavier containers securely and keep labels intact so instructions and warnings remain visible.
Cleaning chemicals should remain in their original containers whenever possible. Never transfer them into food or beverage bottles. Keep products away from children and pets, and separate incompatible chemicals. Good ventilation is important when using many household cleaners.
Organization saves time because the correct product is easy to locate, but safety remains more important than convenience. A cleaning hack is only useful when it protects both the surface and the person performing the task.
Build Preventive Habits That Keep the Home Cleaner Longer
Prevent dirt from accumulating instead of relying exclusively on better removal methods. Use entry mats, wipe spills promptly, ventilate bathrooms, cover food in the microwave, clean cooking grease early, empty bins regularly, and return objects to designated storage areas.
Create small rules around the highest-mess activities. Shoes can be removed near an entrance, pet paws can be wiped after muddy walks, shower walls can be squeegeed, and kitchen counters can be cleared after cooking. Each action removes a future cleaning task.
The most effective cleaning hacks are therefore often preventive rather than reactive. A surface that receives thirty seconds of maintenance today may avoid twenty minutes of scrubbing later.
Conclusion
Cleaning hacks are most valuable when they simplify routine maintenance without damaging household surfaces. Small changes such as cleaning from top to bottom, using microfiber, allowing cleaners adequate contact time, vacuuming before wet cleaning, blotting spills, squeegeeing shower glass, and treating grease or mineral deposits with appropriate products can dramatically reduce cleaning effort.
The strongest cleaning system combines the right chemistry, the right tools, and consistent prevention. Dish soap works particularly well against grease, mild acids can tackle compatible mineral deposits, gentle abrasion can remove selected residue, and microfiber can capture dust efficiently. At the same time, every surface should be treated according to its material and care requirements.
Rather than waiting for the entire home to become dirty, distribute maintenance throughout the week. Clean spills when they happen, control moisture, remove loose dust before it adheres, and maintain the tools you use. These simple cleaning hacks can keep kitchens, bathrooms, floors, furniture, appliances, and living spaces cleaner while reducing the amount of time required for future deep cleaning.
Discover the latest fashion trends, home ideas, travel tips, and lifestyle inspiration at thefreecloset.com.
FAQ’s
No. Vinegar is acidic and may damage acid-sensitive surfaces such as marble, limestone, travertine, and some specialty finishes. Check manufacturer guidance before using it on an unfamiliar material.
Baking soda can absorb or neutralize some odors, particularly in enclosed dry spaces, but the odor source should still be identified and cleaned. It cannot solve odors caused by spoiled food, leaks, mold, or persistent contamination.
Dust higher surfaces first, then vacuum the floor. If a surface contains heavy loose dust, vacuuming that specific surface before wiping can also make cleaning easier.
Work from top to bottom, group similar tasks together, carry supplies in a caddy, declutter before wet cleaning, let cleaning products work before scrubbing, and maintain high-mess areas daily.
Remove water from shower walls and glass with a squeegee after use, improve bathroom ventilation, and clean light residue regularly before soap scum and mineral deposits become thick.
Never mix bleach with ammonia, vinegar, acidic cleaners, or other household cleaning products unless the product manufacturer explicitly states that combination is safe. Mixing incompatible chemicals can release hazardous gases.