


Highlights
- Learn a complete step-by-step method for how to do dip nails at home with salon quality results.
- Understand the essential tools, nail prep techniques, powder application methods, sealing steps, and long-term maintenance.
- Identify common problems and discover easy fixes to prevent lifting, cracking, uneven texture, and staining.
- Explore shaping strategies, color blending techniques, safe removal methods, and hygiene practices for long-lasting results.
- Access multiple comparison tables to simplify product choices and tool selection.
Creating beautiful dip nails at home has become one of the most popular ways to achieve a long-lasting and salon quality manicure without leaving the house. This method uses colored powder layered over a bonding liquid to form a strong, glossy finish that resists chipping far longer than traditional polish. Learning how to do dip nails at home gives you the freedom to choose your own colors, customize thickness, and maintain your nails on your own schedule. With the right tools, proper preparation, and a step by step approach, anyone can master this technique and enjoy durable, professional looking results. This guide explains everything you need to know so your dip manicure turns out smooth, even, and long lasting every time.
Gather All Required Tools and Materials
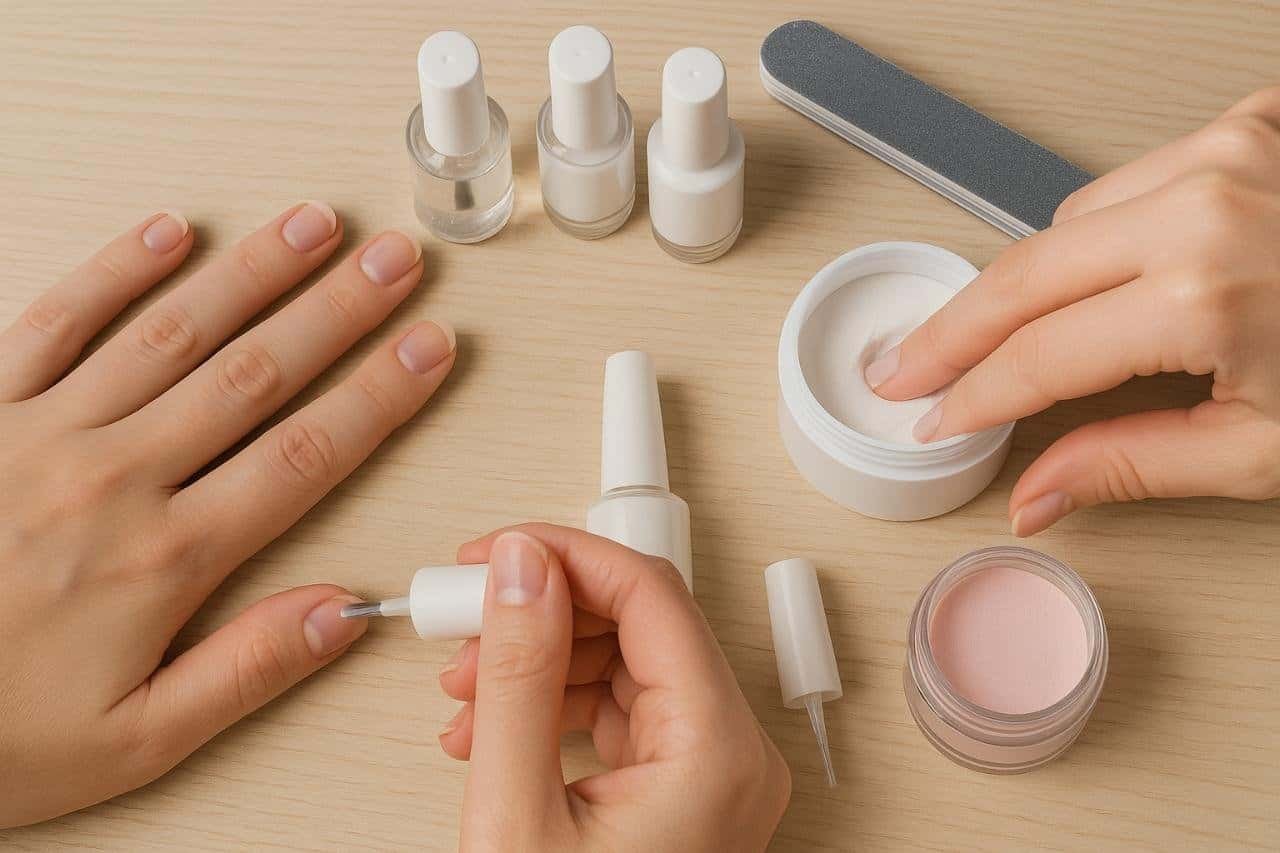
Before starting your dip manicure, you need to assemble the complete kit to avoid interruptions during the process. Having everything ready improves precision and reduces the chance of contamination and uneven drying. This preparation ensures each step flows smoothly and produces consistent results across all fingers.
A basic dip nail setup includes dip powder, base coat, activator, top coat, nail file, buffer, cuticle pusher, brush, alcohol wipes, and lint free pads. Some people also use a nail dehydrator or a primer to improve adhesion. When you gather everything in advance, the process becomes much easier and prevents rushed application that may result in thick or unstable layers.
Different brands offer variations in texture, drying time, and finish. Some powders are extra fine for a smooth look, while others create more volume on the nail. Choosing quality ingredients will improve durability, color clarity, and ease of application.
Select Your Dip Powders
When choosing your powders, consider coverage strength, shade accuracy, and how many layers are needed to achieve your desired look. Fine powders create smoother layers and are easier for beginners to control. Brighter colors often require three coats, while neutral shades may only need two.
Choose Supportive Liquids
Your base coat, activator, and top coat influence how long the manicure lasts. A strong base ensures the powder adheres properly. A reliable activator speeds curing without leaving residue. The top coat determines shine, smoothness, and scratch resistance.
Prepare and Clean Your Nails Properly
Proper nail preparation is the foundation of a long-lasting dip manicure. The goal is to create a clean, dry, and even surface so the powder layers adhere smoothly. When your nails are fully prepped, each coat bonds better and prevents lifting at the edges.
Start by washing your hands, drying them carefully, and gently pushing back your cuticles. Remove any oils using an alcohol wipe. Trimming your nails is optional, but shaping them before the dip process makes the final result more polished. Buffing lightly removes shine from the natural nail and creates a slightly rough surface that helps adhesion.
If you skip prep, your dip manicure may peel early, develop bumps, or chip at the tips. Taking two to three extra minutes for thorough preparation dramatically increases durability and appearance.
Shape the Nail Edges
Use a fine file to create your preferred shape such as round, square, oval, or almond. Consistent shaping across all nails ensures even application and reduces the risk of cracking along weak points.
Remove Oil and Moisture
Oil is the number one cause of lifting. Use alcohol or a nail dehydrator to ensure every nail is fully dry. Avoid touching your hair or face afterward to keep the surface free from residue.
Apply the Base Coat Evenly
The base coat acts as the adhesive layer for the powder, so applying it evenly is essential for clean layers. The goal is to coat each nail from side to side without flooding the cuticle. An even base prevents clumps, streaks, and thick ridges.
Work on one nail at a time. Apply a thin layer, making sure the brush does not leave streaky lines. The base coat dries quickly, so avoid working too slowly. Keep a paper towel nearby to dab excess liquid from the brush if needed.
The thickness of the base coat determines how well the powder attaches. A coat that is too thin may lead to patchy coverage, while a coat that is too thick creates bulky layers. Practice helps you find the right balance for your preferred powder.
Avoid the Cuticle Area
Leave a tiny gap between the cuticle and the base coat. This prevents lifting and allows the manicure to grow out naturally without catching on hair or clothing.
Control the Brush Stroke Direction
Move your brush in one direction, starting from the base of the nail and finishing at the tip. This technique ensures even coverage and helps the powder settle smoothly when dipped.
Build Layers With the Dip Powder
This is the central step where color, strength, and thickness come together. The technique involves dipping or spooning the powder over your nail coated in base liquid. Fine powders create soft, even layers while coarse powders create more volume.
Hold your finger over the jar at a slight angle and dip slowly to avoid creating bubbles. Tap off excess gently using the side of the jar. After each layer, use a soft brush to remove loose powder before applying the next coat. Repeat until you achieve the desired opacity.
Layering also determines how durable your manicure becomes. Thicker nails last longer but may feel heavy. Thinner nails look natural but may require more careful handling. Customize the thickness depending on your daily activities and preferred look.
Build Two to Three Layers
Most people apply two or three layers of powder. Lighter colors or sheer blends may require a third or fourth coat, while darker shades often reach full coverage in two coats.
Brush Between Each Step
Use a clean fluffy brush to remove leftover powder from the fingertips and cuticle lines. This step prevents uneven areas and helps the next base coat layer glide smoothly.
Activate the Powder to Harden the Structure
Once the final powder layer is complete, apply the activator to harden the material. This chemical reaction transforms the powder into a solid, durable surface. Without the activator, the powder remains soft and fragile.
The activator dries quickly, and the surface may feel warm as it cures. Avoid touching your nails during this stage. After drying, you can move on to shaping the surface with a file or buffer to create the final contour.
Activators differ in strength and speed. Some formulas require only a single coat, while others benefit from a second pass. If the surface remains slightly tacky, give it a minute or two more to cure fully.
Test for Hardness
Lightly tap the tip of your nail on the table. If it feels firm instead of flexible, the activator has fully cured. If not, add another thin layer.
Smooth the Surface After Curing
Once hardened, use a file or buffer to refine the thickness, eliminate bumps, and reshape the nail. This improves comfort and appearance before adding the final protective top coat.
Seal the Manicure With a Top Coat
The top coat protects your dip manicure from scratches, water exposure, and daily wear. It also gives the nails a shiny or matte finish depending on your preference. A good top coat prevents discoloration and enhances the overall smoothness of the surface.
Apply two thin layers for the best results. The first layer bonds with the powder, and the second creates the glossy seal. Allow each coat to dry fully before touching anything. Avoid heavy pressure for the first few hours after finishing the manicure to maintain the smooth finish.
The quality of the top coat affects how long your manicure lasts. A strong formula resists dulling and keeps the nail surface intact until the next removal.
Apply in Light, Quick Strokes
Using too much product at once can create streaks. Apply thin strokes from base to tip, working quickly to avoid dragging the liquid across partially dried areas.
Protect the Nail Edges
Seal the free edge of the nail by brushing the top coat along the tip. This prevents water from entering and reduces chipping over time.
Maintain and Safely Remove Your Dip Nails
Good maintenance keeps your dip nails looking fresh for weeks. Avoid picking at them, pushing them against hard surfaces, or soaking them in water for extended periods. Moisturize your cuticles daily to maintain healthy nail growth.
When it is time to remove the manicure, use an acetone soak instead of peeling. Peeling damages natural nails and causes thinning. File the topcoat lightly before soaking to help the acetone break through the layers more easily.
Safe removal takes patience. Acetone softens the powder until it flakes away gently. After removal, wash your hands and apply cuticle oil to rehydrate the nail bed.
Maintain Proper Hygiene
Keep your tools clean after each use. Bacteria can cling to brushes and files. Proper cleaning prevents irritation, infection, and residue buildup.
Use the Foil Soak Method for Removal
Wrap each finger in foil with an acetone-soaked cotton pad. Wait 10 to 15 minutes, then check progress. The dip layers should crumble easily with gentle pressure.
Essential Dip Nail Tools
| Tool | Purpose | Notes |
| Base Coat | Creates adhesion layer | Must be thin and even |
| Activator | Hardens powder | Works within seconds |
| Top Coat | Protects and shines | Usually applied twice |
| Dip Powder | Provides color and strength | Finer powders create smoother layers |
Removal Options
| Method | Speed | Nail Health Impact |
| Foil Soak | Moderate | Safest for natural nails |
| Bowl Soak | Fast | Requires more acetone exposure |
| Peeling | Fast | Not recommended due to damage |
Conclusion
Learning how to do dip nails at home gives you freedom, creativity, and long-lasting beauty without the expense of salon visits. By gathering the right supplies, preparing the nails carefully, applying powders with precision, and finishing with a strong protective top coat, you can achieve results that rival professional manicures. Consistent practice makes each step easier, and the techniques in this guide help you prevent lifting, cracking, uneven layers, or early chipping. With proper maintenance and safe removal methods, your nails stay healthy between applications. A complete dip manicure becomes simple, enjoyable, and reliable when each step is followed methodically.
FAQ’s
They typically last two to four weeks depending on nail health, preparation quality, and daily habits.
Yes, dip nails are beginner friendly when you apply thin layers, use a good brush technique, and follow each curing step properly.
No, they do not cause harm when applied and removed correctly. Damage usually comes from peeling instead of soaking.
Most manicures require two to three layers, but lighter shades or sheer styles may need an additional layer.
Yes, powders blend well. You can mix them in a small container or apply separate colors in layers.
Lifting often results from oil on the nail, thick base coats, or product touching the cuticle. Proper prep and thin layers solve this problem.


