


Highlights
- I started by walking around my home and identifying the exact spots where protection mattered most. This helped me avoid blind spots and made sure every important entry point was covered from day one.
- Choosing the right cameras changed everything for me. I learned that indoor and outdoor cameras serve different purposes, and selecting the correct type for each area improved clarity, durability, and overall performance.
- Preparing my tools and checking power and internet access before installation saved me hours of frustration. Once everything was ready, the actual installation felt smooth and controlled.
- Installing indoor cameras taught me the importance of height and angle. By mounting them at the right level, I could clearly see faces and movements without compromising privacy or visibility.
- Outdoor camera installation was where planning really paid off. Positioning cameras under shelter and sealing mounts protected them from weather and ensured reliable recording day and night.
- Connecting the system and fine tuning settings helped me reduce false alerts and focus only on real activity. Adjusting motion sensitivity made the system practical instead of annoying.
- Regular maintenance became part of my routine. Cleaning lenses, checking mounts, and reviewing footage kept the system working like new and gave me consistent peace of mind.
- By following a step by step approach, I turned home security camera installation from an overwhelming task into a confident and rewarding experience that continues to protect my home every day.
Home security camera installation is one of the most practical upgrades you can make to protect your property, family, and peace of mind. I have personally installed multiple camera systems over the years, from small apartments to full sized houses, and I can confidently say that doing it the right way makes a huge difference in performance and reliability. In this guide, I will walk you through the entire process as if I were standing next to you, explaining every step clearly and practically. You will learn how to plan, choose, install, test, and maintain your camera system without confusion or wasted effort.
This article is written for homeowners who want real results, not generic advice. I will share what worked for me, what I learned the hard way, and how you can avoid common mistakes while installing your own home security cameras.
Plan Camera Coverage Areas Properly

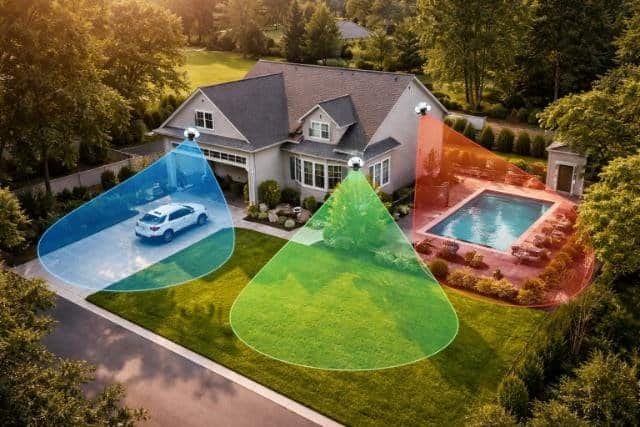
The first thing I always do before installing any camera is plan the coverage areas. This step determines how effective the entire system will be. You need to decide exactly what you want to monitor, such as entrances, driveways, backyards, hallways, or common rooms. When I skipped proper planning during my first installation, I ended up with blind spots that defeated the purpose of having cameras at all.
Start by walking around your home and imagining where a person would approach or enter. Doors, windows, garages, and side paths should always be prioritized. You should also think about camera height and viewing angle so faces and movements are clearly visible rather than just the tops of heads.
Identify High Risk Entry Points
High risk entry points are the most common places intruders attempt to access. In my experience, front doors and back doors are non negotiable camera locations. Garages are also critical because they often provide direct access to the house. Ground floor windows deserve attention, especially those hidden from street view.
When planning these areas, I recommend standing where the camera would be mounted and checking the line of sight. Make sure nothing blocks the view, including trees, fences, or decorations. This simple check saved me from repositioning cameras later.
Avoid Blind Spots and Overlapping Views
Blind spots reduce the effectiveness of your security system. I learned to avoid placing cameras too close together unless there is a specific reason. Overlapping views can be helpful at entrances but waste coverage in open areas. The goal is balanced coverage, not redundancy everywhere.
I usually sketch a rough layout of my home and draw camera angles. This does not need to be perfect. It just helps visualize coverage and identify gaps before installation begins.
Choose the Right Type of Security Cameras
Choosing the right camera type is just as important as placement. Different cameras serve different purposes, and selecting the wrong one can lead to frustration. I have tested wired, wireless, indoor, and outdoor cameras, and each has its strengths depending on the situation.
Think about where each camera will be installed and what conditions it will face. Lighting, weather, power access, and internet strength all influence your choice.
Compare Wired and Wireless Camera Options
Wired cameras provide stable connections and consistent video quality. I prefer them for permanent installations, especially outdoors. They require more effort during installation because of cabling, but they are reliable in the long run.
Wireless cameras are easier to install and great for renters or temporary setups. However, they depend on WiFi strength and battery life. I use wireless cameras indoors where access to outlets is limited and signal strength is strong.
Select Indoor and Outdoor Camera Models
Indoor cameras are designed for controlled environments. They usually have wider viewing angles and compact designs. Outdoor cameras are built to withstand rain, heat, and cold. I always check weather ratings before installing outdoor units.
Night vision is essential for both indoor and outdoor cameras. Make sure the camera has infrared or low light capability so it performs well after dark.
Prepare Tools and Installation Materials
Preparation saves time and prevents mistakes. Before I start any installation, I gather all tools and materials in one place. This keeps the process smooth and reduces interruptions.
You should read the camera manual carefully before starting. Even experienced installers benefit from reviewing mounting instructions and power requirements.
Gather Basic Installation Tools
Most installations require simple tools like a drill, screwdriver, level, measuring tape, and ladder. For wired systems, you may also need cable clips, wall anchors, and a fish tape for running wires through walls.
I always test my drill bits and charge my tools beforehand. Nothing slows you down more than stopping mid installation to fix equipment issues.
Check Power and Network Readiness
Cameras need reliable power and internet connections. Before mounting anything, I test outlets and check WiFi signal strength in each camera location. Weak signals cause lag and disconnections, which can be frustrating later.
If you plan to use cloud storage or remote viewing, make sure your internet plan supports multiple devices streaming video at the same time.
Install Indoor Security Cameras Correctly
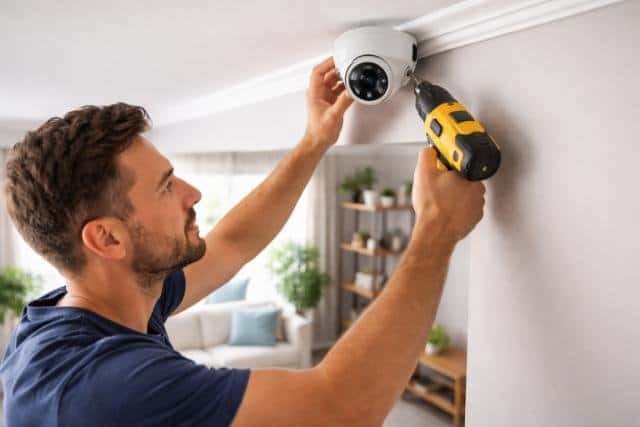
Indoor camera installation is usually straightforward, but placement still matters. I focus on areas where movement is expected, such as living rooms, hallways, and entry points.
Mounting cameras too high or too low can reduce image clarity. I aim for a height that captures faces clearly without being easily tampered with.
Mount Cameras at Optimal Height
From my experience, mounting indoor cameras about seven to eight feet above the floor works best. This height provides a wide view while keeping the camera out of reach.
Use a level when mounting to avoid tilted footage. Even a small angle can affect video quality and detection accuracy.
Adjust Angles for Clear Visibility
Once mounted, adjust the camera angle carefully. I check live footage on my phone while adjusting to ensure proper framing. Make sure important areas are centered and well lit.
Avoid pointing cameras directly at windows or light sources. Glare and reflections can ruin footage quality.
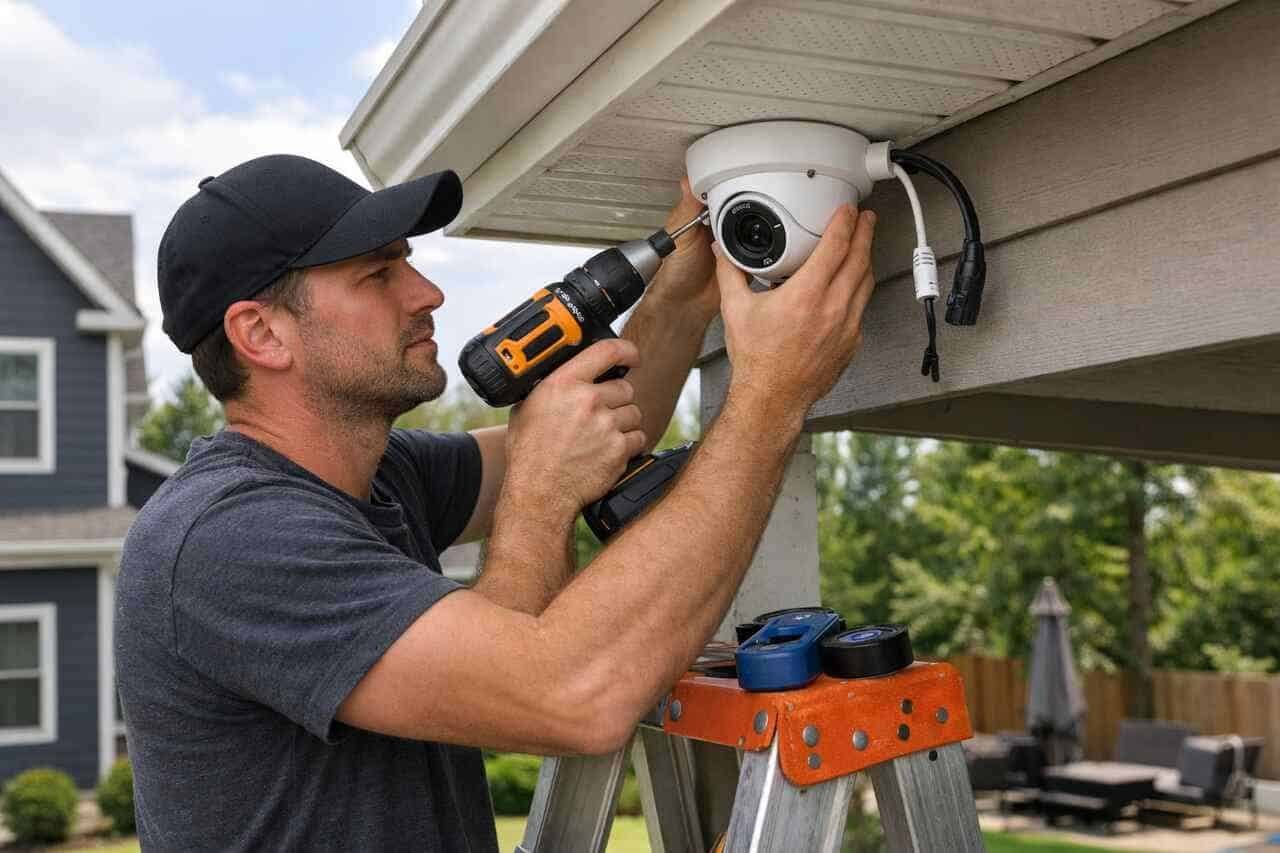
Install Outdoor Security Cameras Safely

Outdoor installations require extra care. Weather exposure, height, and wiring all add complexity. I take my time during this step because outdoor cameras are critical for perimeter security.
Safety is also important. Always use a stable ladder and avoid installing cameras during bad weather.
Secure Cameras Against Weather Conditions
Outdoor cameras should be mounted under eaves or awnings when possible. This provides extra protection from rain and direct sunlight. I also seal mounting holes with outdoor rated sealant to prevent water damage.
Check that all cables are properly insulated and secured. Loose wires can degrade quickly outdoors.
Position Cameras to Capture Motion Clearly
Outdoor cameras should cover driveways, entrances, and yards without capturing unnecessary areas. I avoid aiming cameras at busy streets or neighbors properties to reduce false alerts.
Motion detection works best when cameras face approaching movement rather than sideways motion. Keep this in mind when positioning.
Connect Cameras to the System and Configure Settings
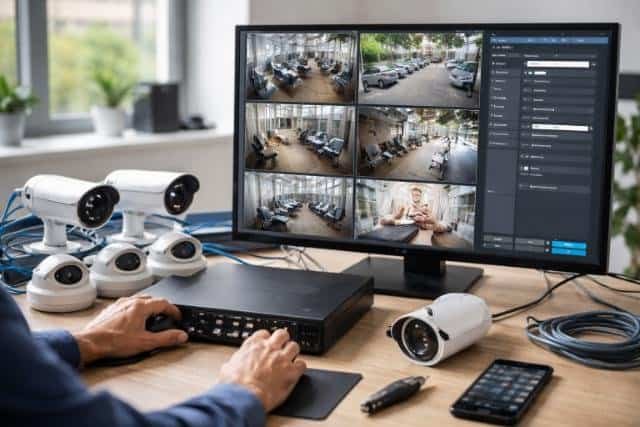
After installation, configuration is where the system truly comes to life. I take time to adjust settings properly so cameras work efficiently without constant alerts.
Most cameras use mobile apps or software dashboards for setup. Follow instructions carefully and update firmware if needed.
Set Up Recording and Alerts
Choose between continuous recording or motion based recording depending on your needs. I prefer motion based recording to save storage space.
Adjust sensitivity levels to reduce false alerts. Wind, pets, and shadows can trigger unnecessary notifications if settings are too sensitive.
Test Live View and Remote Access
Once everything is connected, test live viewing from different devices. I always check access while connected to mobile data to ensure remote monitoring works properly.
If there are delays or connection issues, reposition the camera or adjust network settings before moving on.
Maintain and Optimize Your Camera System Over Time
Installation is not the final step. Regular maintenance keeps your system effective. I schedule quick checks every few months to ensure everything is working properly.
Dust, weather, and software updates all affect performance over time.
Clean Lenses and Check Mounts
Dirty lenses reduce image clarity. I clean camera lenses gently with a microfiber cloth. I also check mounts and screws to ensure cameras remain secure.
Outdoor cameras especially need periodic inspections after storms or extreme weather.
Review Footage and Update Settings
Review recorded footage occasionally to confirm video quality and coverage. If you notice blind spots or missed events, adjust angles or sensitivity settings.
Software updates often improve performance and security. Enable automatic updates when available.
Comparison of Camera Installation Choices
| Installation Aspect | Basic Setup | Advanced Setup |
| Camera Placement | Entry points only | Full perimeter coverage |
| Wiring Method | Wireless | Wired and concealed |
| Recording Mode | Motion only | Motion and scheduled |
| Maintenance Level | Low | Moderate |
Key Installation Considerations
| Area | Recommended Height | Camera Type |
| Front Door | 7 to 9 feet | Outdoor |
| Living Room | 7 feet | Indoor |
| Garage | 8 to 10 feet | Outdoor |
| Backyard | 9 to 12 feet | Outdoor |
Conclusion
Home security camera installation is a powerful way to protect your home when done correctly. From planning coverage to choosing the right cameras and maintaining the system, every step matters. Based on my experience, taking the time to plan and install thoughtfully leads to fewer problems and better results. When you follow a structured approach and stay proactive with maintenance, your camera system becomes a reliable part of your home security strategy.
FAQ’s
Most installations take between two to six hours depending on the number of cameras and wiring complexity.
Yes, most modern systems are designed for do it yourself installation with clear instructions.
Avoid placing cameras directly facing bright lights, reflective surfaces, or areas with heavy traffic that can cause false alerts.
Cameras with battery backup or connected to backup power sources continue working during outages.
A basic inspection every three months is usually sufficient to maintain performance.
Professional installation is helpful for complex setups, but most homeowners can handle standard installations successfully.


